MusicBox PaperStrip Editor
Our software MusicBox PaperStrip Editor helps you to arrange the melody on a virtual paper strip on the screen, lets you play the melody, correct it and print it on your printer.
The software works after download as Lite version, with slightly limited functionality. Of course, we will be happy if you purchase the license (key) to the Plus version.
Download PaperStrip Editor Lite 1.1.0
Windows Installer Software:
PaperStrip-Editor-1.1.0.msi
Mac Installer Software (verified by Apple):
PaperStrip-Editor-1.1.0.dmg
Upgrade Lizenz oder 'Buy Me a Coffee'
You can order the license to upgrade from PaperStrip Editor Lite to PaperStrip Editor Plus from Perpetuum Mobile . After transferring the amount we will send you the upgrade key by email.
If you don’t need a full version but still want to appreciate our effort, you have the possibility to do so here:

Funktionen
| Funktion | Lite | Plus |
|---|---|---|
| Insert notes | + | + |
| Delete notes | + | + |
| Play melody | + | + |
| Print paper strip | + | + |
| Copy note ranges | + | + |
| Delete note ranges | + | + |
| Play note ranges | + | + |
| Various settings | + | + |
| Save melody (Midi) | - | + |
| Read melody (Midi) | - | + |
| Melodies over multiple strips | - | + |
After opening the program, an almost empty window appears for the first time. If you put the mouse pointer on an active button, a description will appear after a short time.

Enlarge the view so you can position the notes more precisely.

Zoom out if you need more clarity.

With this button you can start a new melody entry with name at any time.

Enter the software license key if you have one. This will turn the lite version into the plus version, which offers more features.

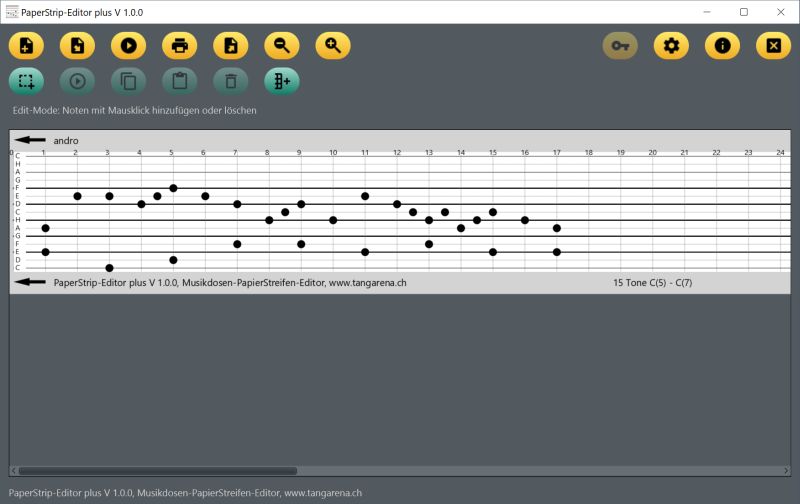
As you can see from the status bar below the green buttons, you are in edit mode at the start.
Since no melody has been entered yet, the Play, Print and Save buttons remain deactivated.

Mouse click on paper strip
Click on the paper strip, the corresponding mark is drawn and the sound is played.
- The Play, Print and Save buttons become active.
Mouse click on marker
Click on one of the marks you have set, it will be removed.
- The Play, Print and Save buttons will be disabled if it was the last one.
Enter more notes and create a little melody.

Click on the play button to play the melody.

Click on the Printer button to print the melody.

Click the export button to save the melody (this is only possible in the plus version).

Import the exported melody again (this is only possible in the plus version).

Once you have reached the end of the strip, you can extend the strip. Then, when printing, a second strip will be created, which can be connected to the first one (this is only possible in the plus version).

Vertical positions
correspond to the number of tones of the comb. The lowest position corresponds to the lowest note, followed by the other other tones of the comb. Not all music boxes have the same number of tones on the comb on all octaves, sometimes 7 (diatonic), sometimes 12 (harmonic), sometimes something in between.
That’s why, for example, the music strips for the 30 tone Musiboxes don’t have staves printed on them. Here, the transfer from a music sheet template is particularly challenging.
Horizontal positions
Internally, ticks are used for positioning. A tick corresponds to the shortest length that the music box can still play in a distinguishable way, if several identical ticks follow one another. Several ticks are combined to a quarter note (this is a value you can set). So if Ticks/Quarter = 2, this means one tick corresponds to a 1/8 note value, if Ticks/Quarter = 4, then one tick corresponds to a 1/16 note value,
When changing from 1/8 to 1/16 note value, the speed and thus the duration of the melody will approximately double. Exact values are not possible, however, because a decisive factor is the speed of the cranking.
While different tones work fine with the smallest distance, it needs more distance for equal tones to sound anew.

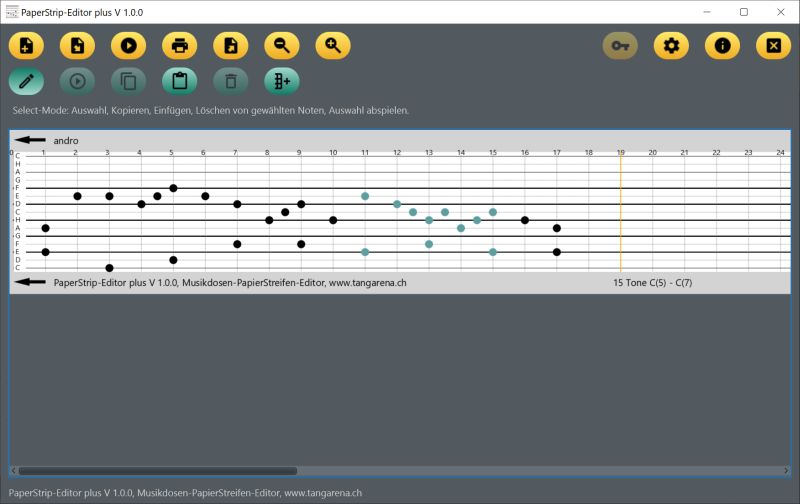
Click on this button and switch to the selection mode. Here you can select, copy and delete notes.
What happens:
- The edit/select button changes its appearance, new the switch to edit mode is offered.
Mouse (Button down and drag).
Use the mouse to select an area that includes one or more notes

Clicking the button will play the selected area

Returns to the edit mode


Copy the selected notes into the buffer
What happens:
- the Paste button will be activated
+++

Cut the selected notes and insert them into the buffer
Click on the paper strip where you want to paste the copied notes
What happens:
- a colored paste bar appears.

Paste the copied notes.
What happens:
- the selection is cancelled
- the copied notes are still in the buffer and can be further pasted


A melody can be exported to a file. For this purpose we use the midi format. So you can play an exported melody with another program (e.g. VLC Media Player).

Of course, you can always import the previously exported melody again and continue working on it.
A midi file created by another program can also be imported in principle. However, then a few boundary conditions must be kept, we have built in only a minimal Midi support.
- only the first channel is evaluated
- only the tones which are defined for the corresponding music box are read in (for 15 tone Kikkerland only the diatonic tones between C5 … C7).

If the ‘Print’ button is clicked, a standard print dialog for selecting the printer will appear.
Note that the information about the printable paper length and width should match the information in the settings.
You should print on heavy paper (200 g/m2), or fix the print for punching on the official paperstrips.
If your tune includes multiple strips, you can glue them together. Note the link to Wintergatan under Links.


This button opens the settings window:

Settings
Music box
Name of the music box type. At the moment only keys_15tone_c5_c7, so the type that is also distributed by Kikkerland. Name of the music box type.KEYS_15 for 15-tone movements, KEYS_20 for 20-tone movements, KEYS_30 for 30-tone movements and SPECIAL for other movements you can define yourself.
Ticks per quarter note
A value of 1 means a minimum of 1/4 note can be entered, 2 means a minimum of 1/8, 4 means a minimum of 1/16.
Tempo
A value for the melody player. 120 BPM means the player plays 120 quarter notes per minute.
Printable paper length in 1/10 mm
The length that the printed paper strip should have. The value must be smaller than the paper size used minus the margins.
Printable paper width in 1/10 mm
The width of the paper format used minus the margins. This value is used to print multiple strips on one page.
Note names
In English, different names are used for notes. This is most noticeable with the note H, which is called B in English. Our B there is Bb.