User Guide
Short description
Lending to a person
If you want to lend something to a person, you create a ‘Lending card’.
with the borrower, the borrowed item, the number and the borrowing period.
The emphasis is on minimal data entry.
In the best case, you only have to type in the item and select the person from a list.
If you have never lent something to that person, you also need to create a ‘Borrower card’ with first name, last name, city, phone and/or email. If you have enabled the “Copy from contacts” option, this will be done almost automatically.
Check and recall
From time to time (or when you are looking for something) check the list of lent out items. Overdue items (with expired loan period) are shown to you with a ‘clock mark’. You can request the item back by accessing the following apps:
- Email app
- Phone app
- Whatsapp (or any other app) using the share function. Stored email addresses, phone numbers and callback texts are used, which you can of course customize in the corresponding app on a case-by-case basis.
Recalled items are indicated with a ‘bell marker’.
Return
If a lent out item is returned, you simply delete the corresponding ‘Lending card’. The ‘Borrower card’ will remain for the time being for future use.
Administration
Here you can change and delete the ‘Borrower’ and ‘Lending’ cards.
Page menu
The menu contains the ‘Settings’, ‘Export’, ‘Backup’, ‘Restore’, ‘Online Help’ and various information pages.
Homepage / Home Page
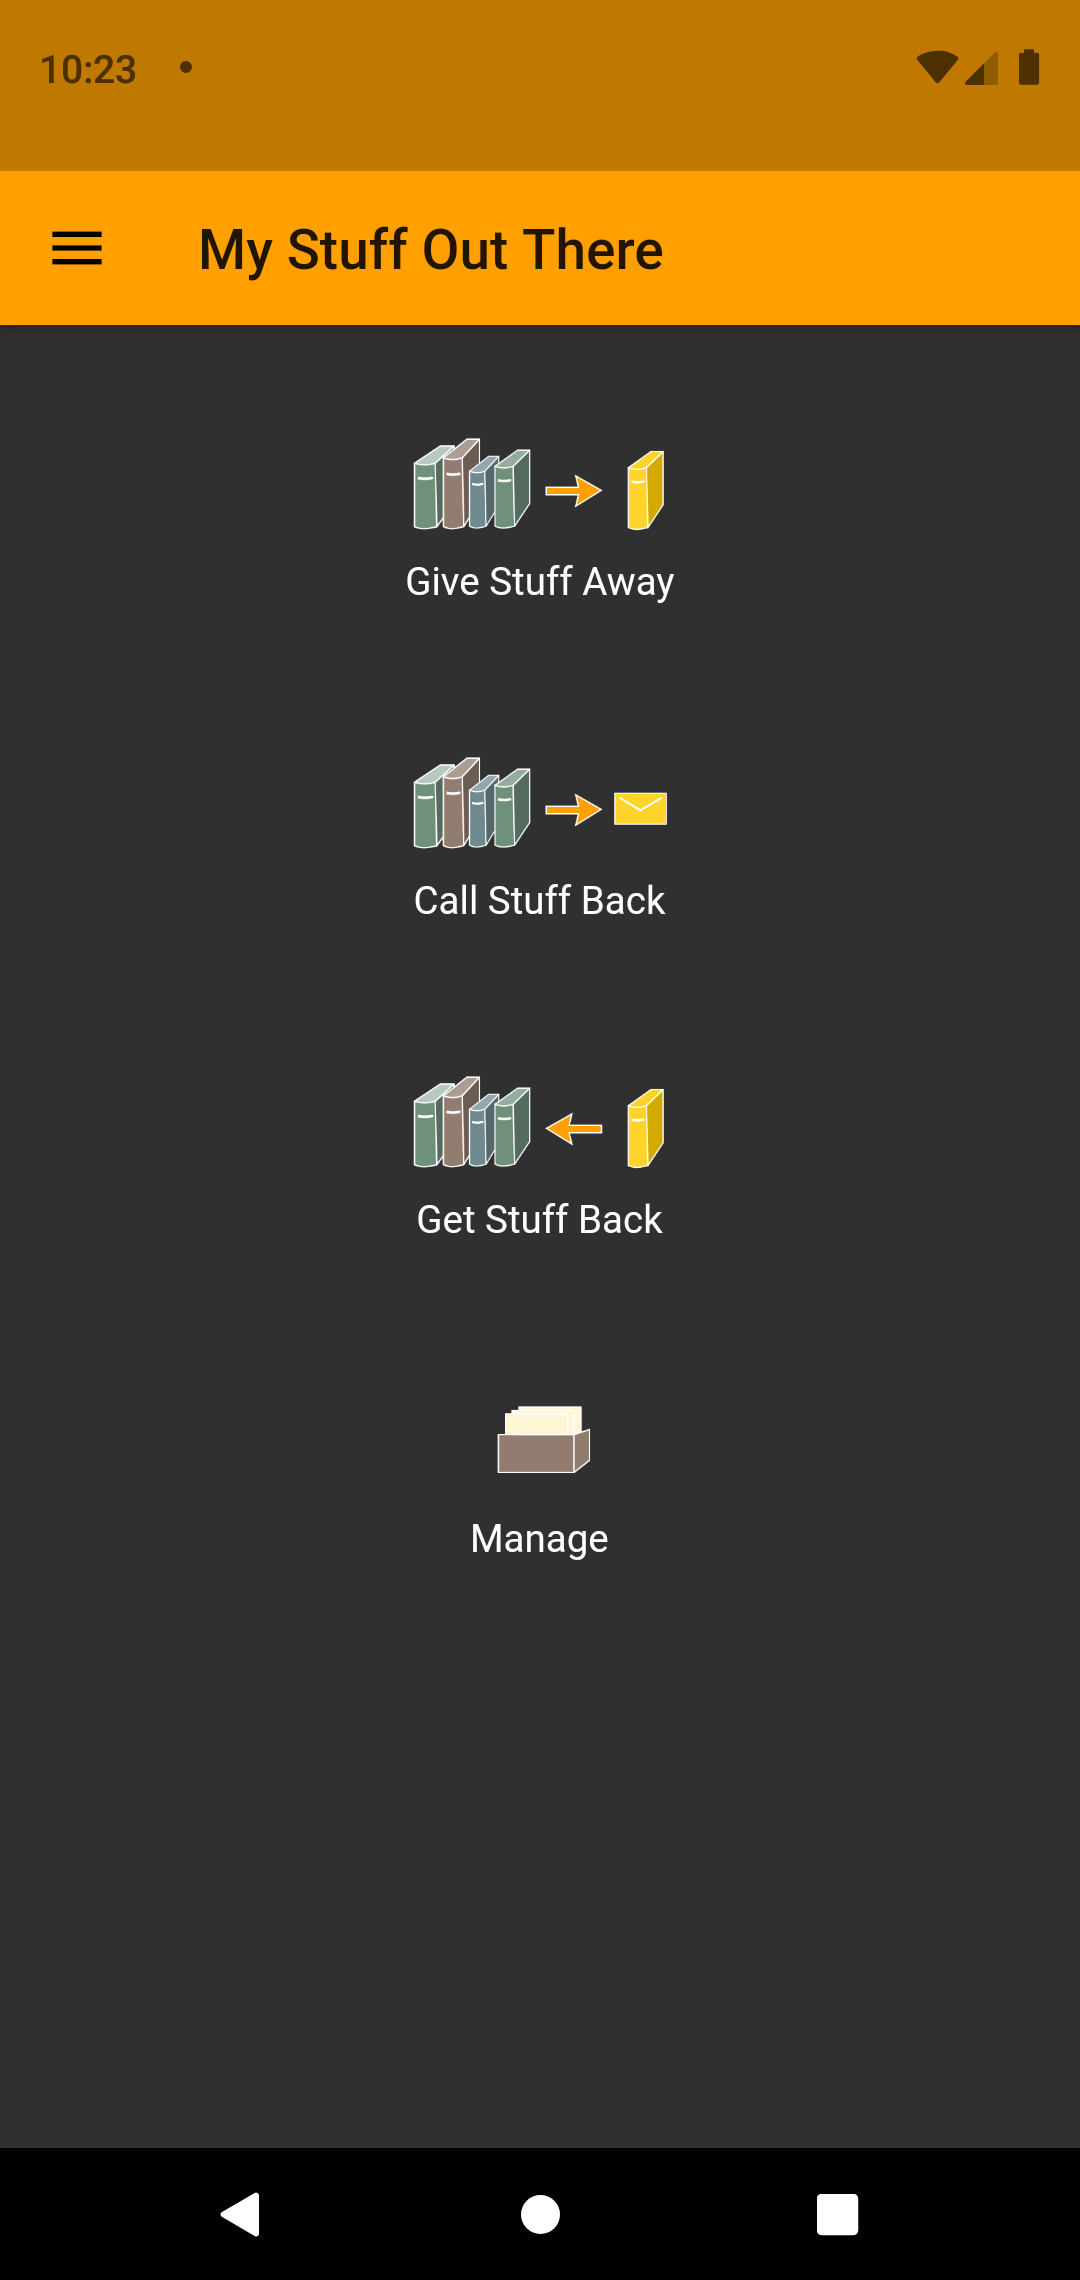
After opening the program, the home page with the main menu appears. From here you can easily select the 3 main activities:

Tap to give away items

Tap to call back items

Tap to receive items back
Additionally, you will find the following buttons:

Tap to manage index cards.
Tap to open the side menu
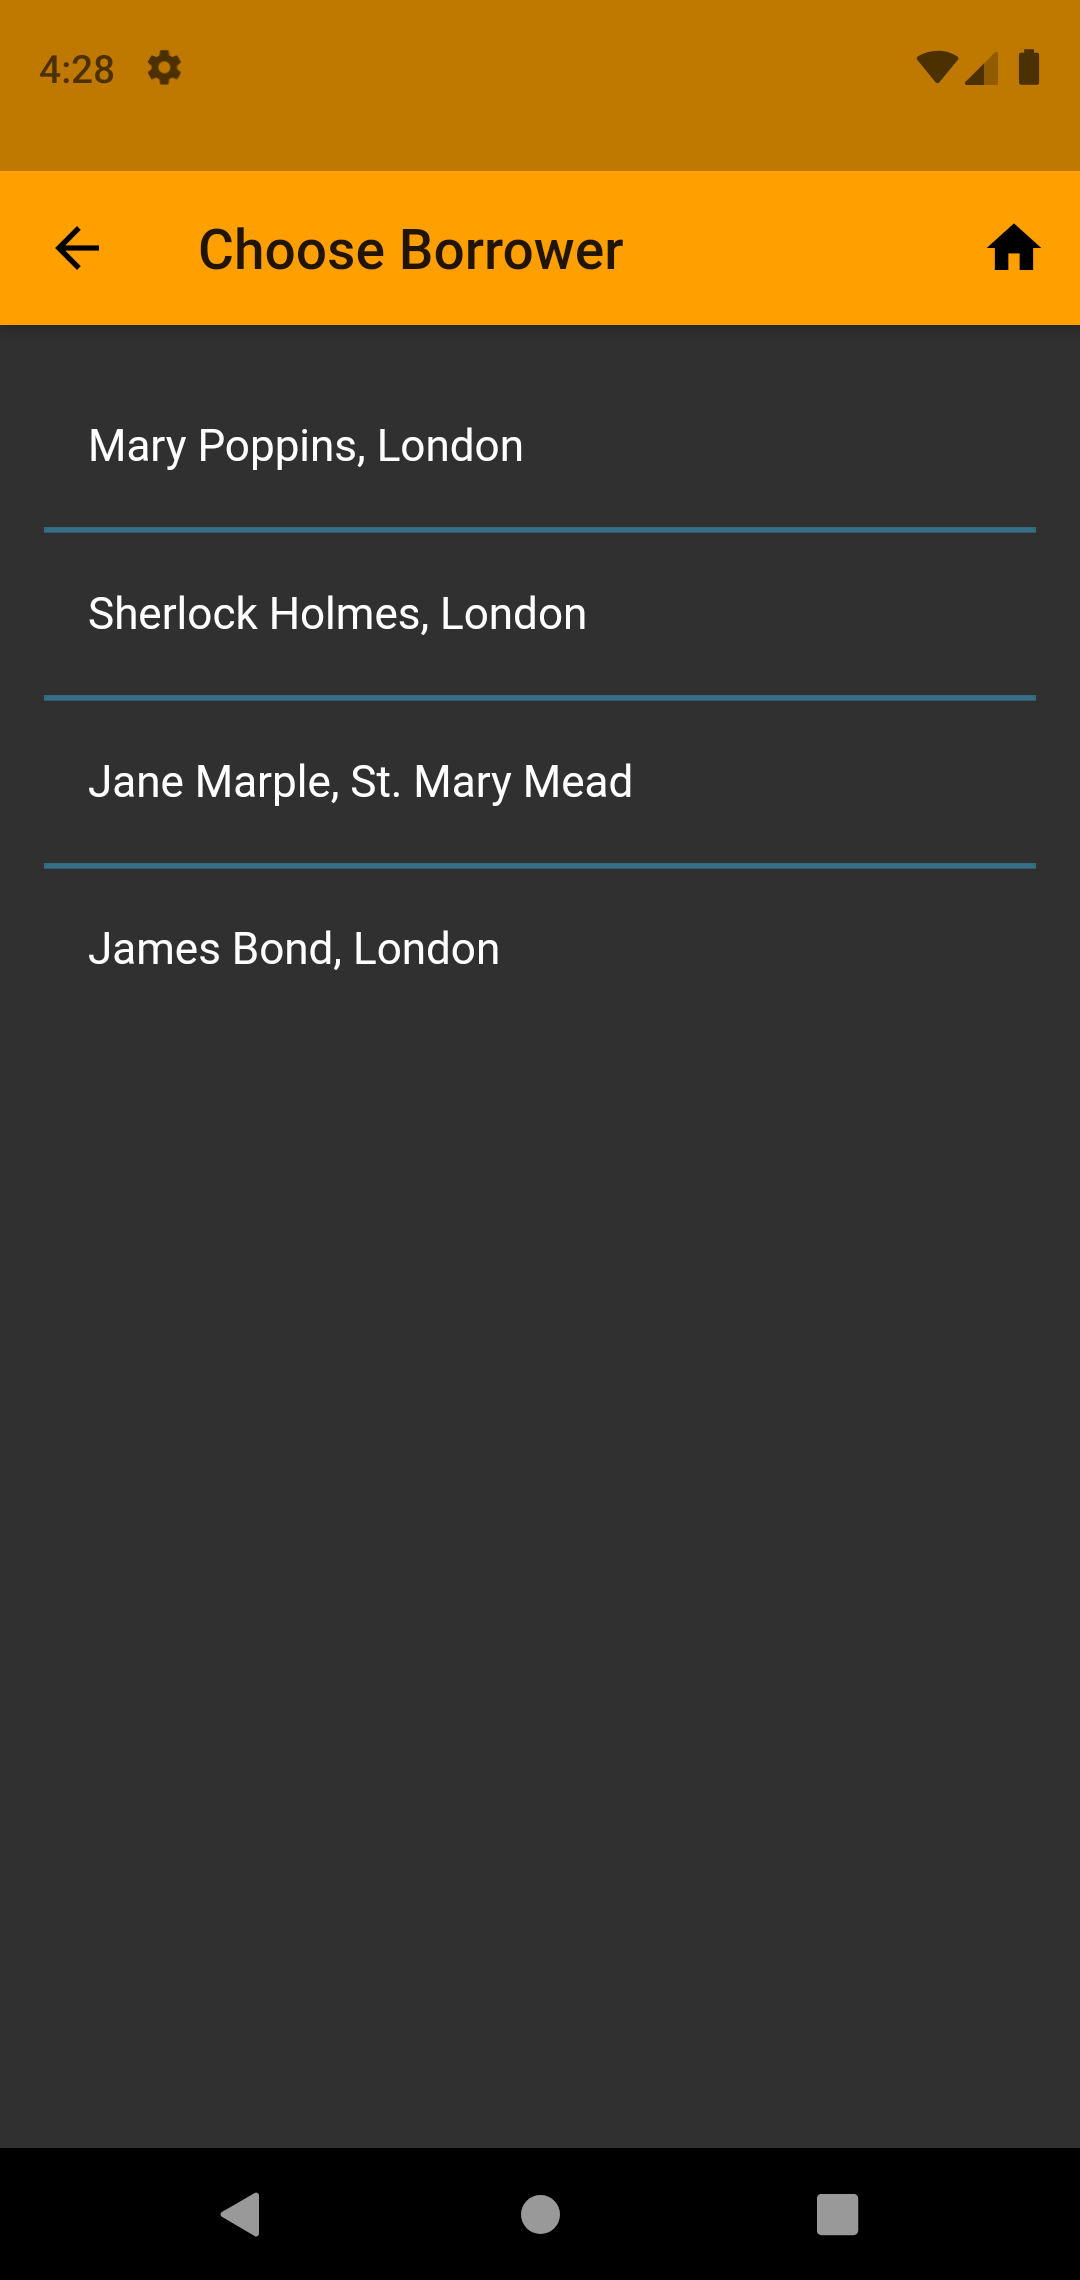
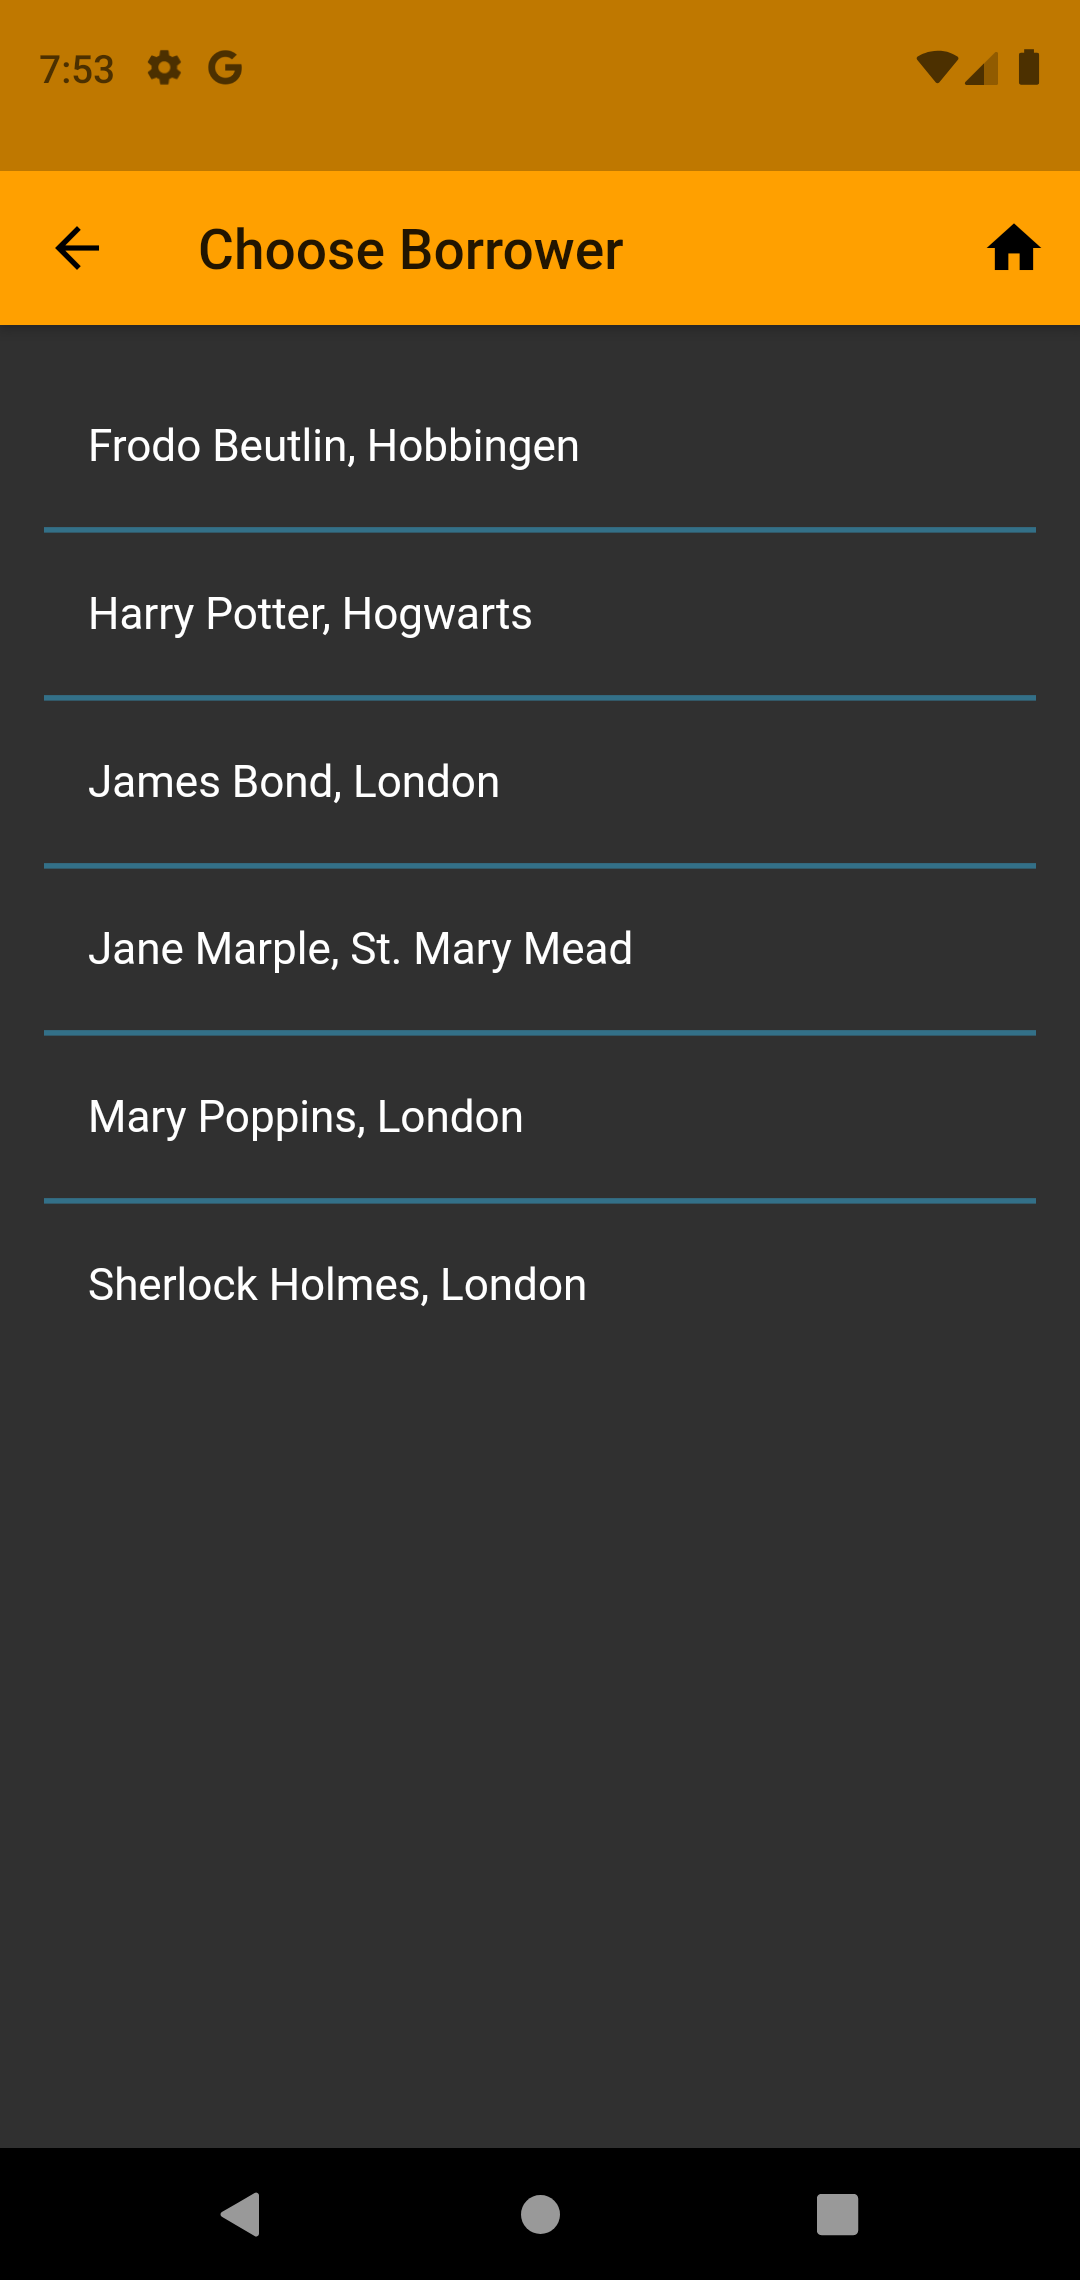
Give-away - Select a borrower
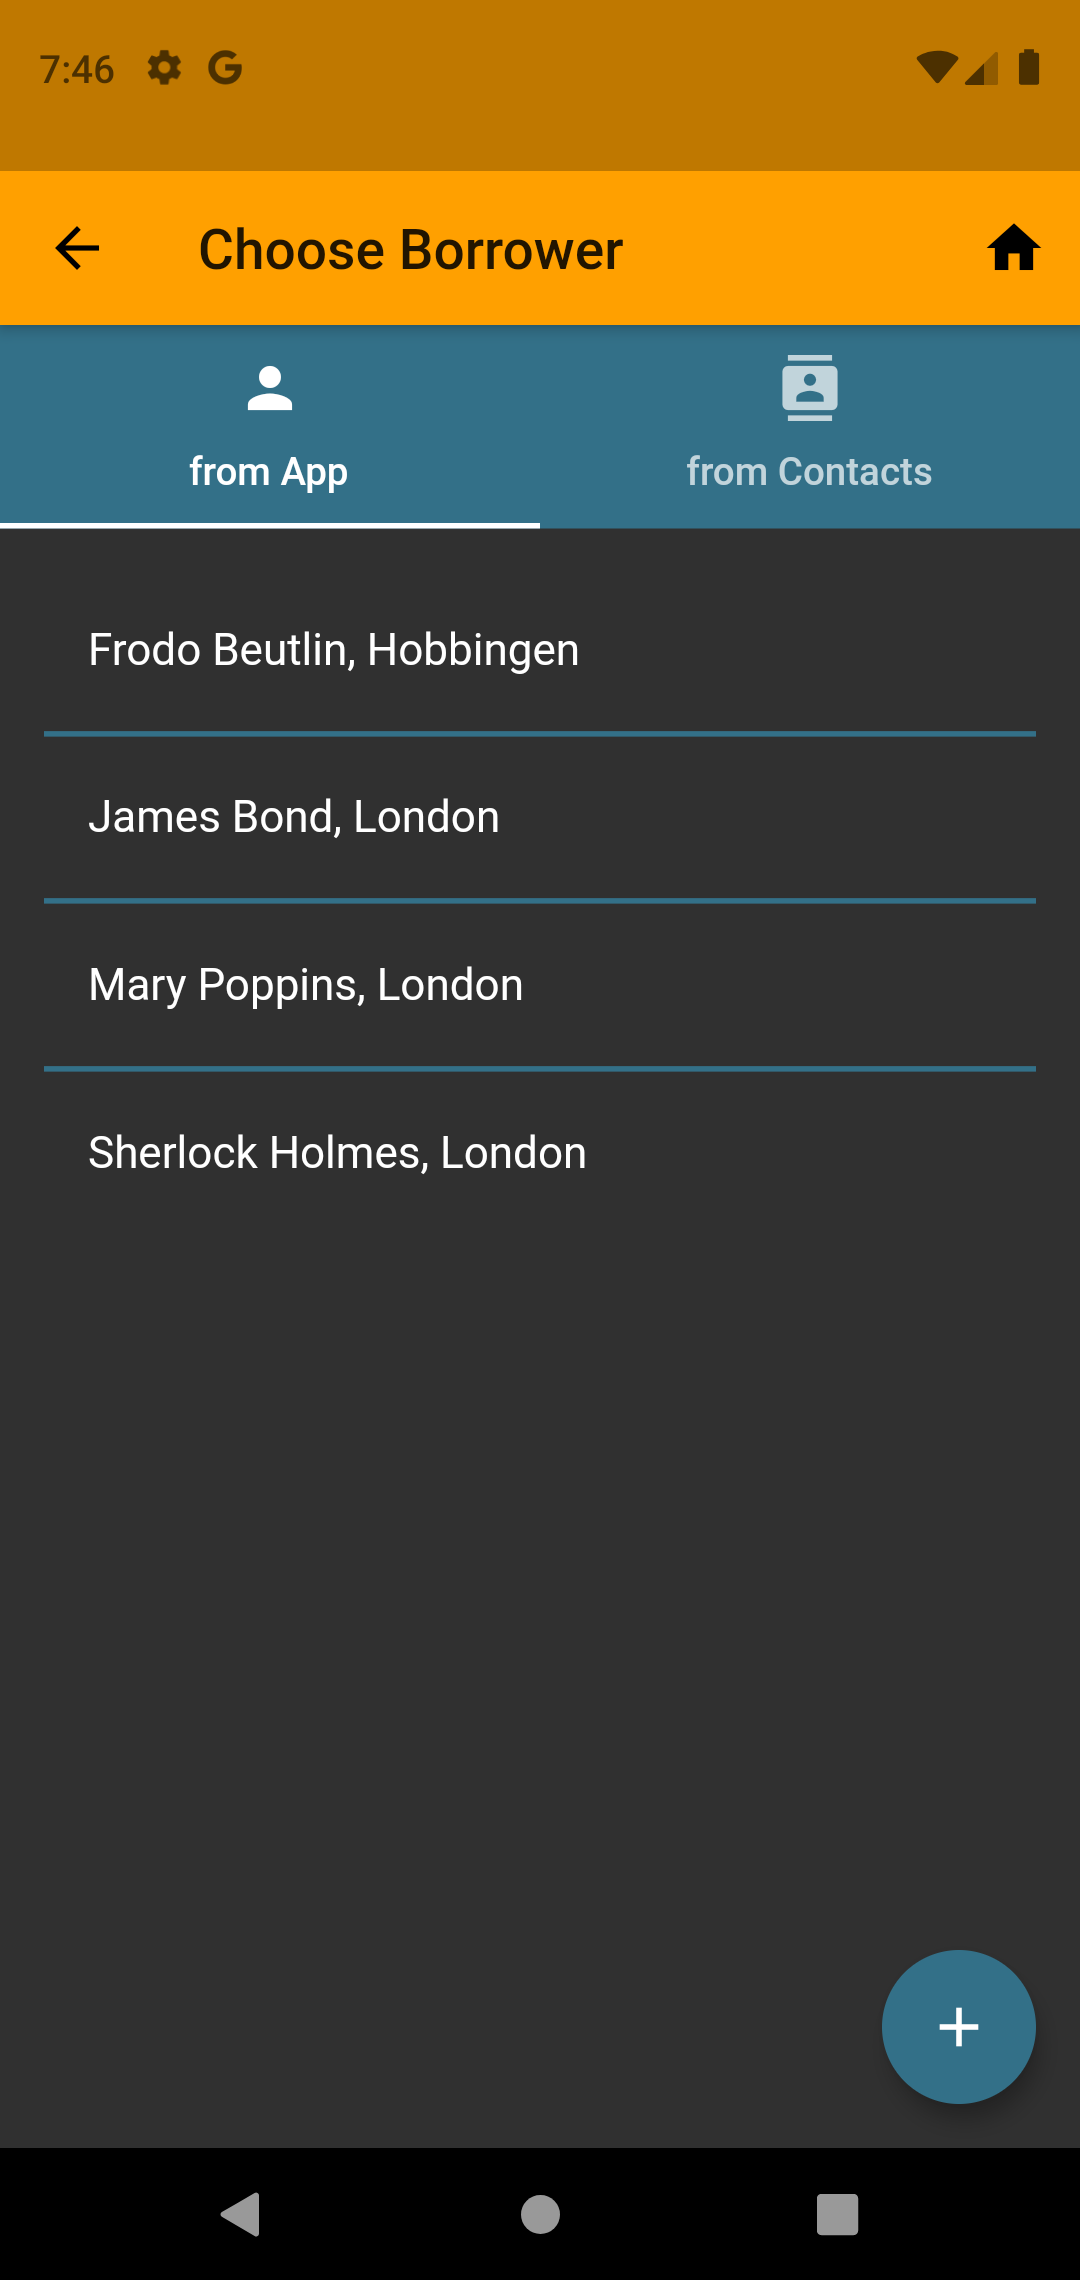
First you define who borrows something by selecting a person from the list. The list will show you people for whom a ‘Borrower card’ exists in the app’s internal card index. If such a card does not exist yet, you can enter it or create it from the contacts.
Tap a list item to create a 'Lending card'.
Tapping the button in the top right tab opens the contact takeover page.
Tapping the button at the bottom right opens a screen for creating a new 'Borrower card'.
Back to the calling page.
Back to the home page.
Give away - Take over borrowers from contacts
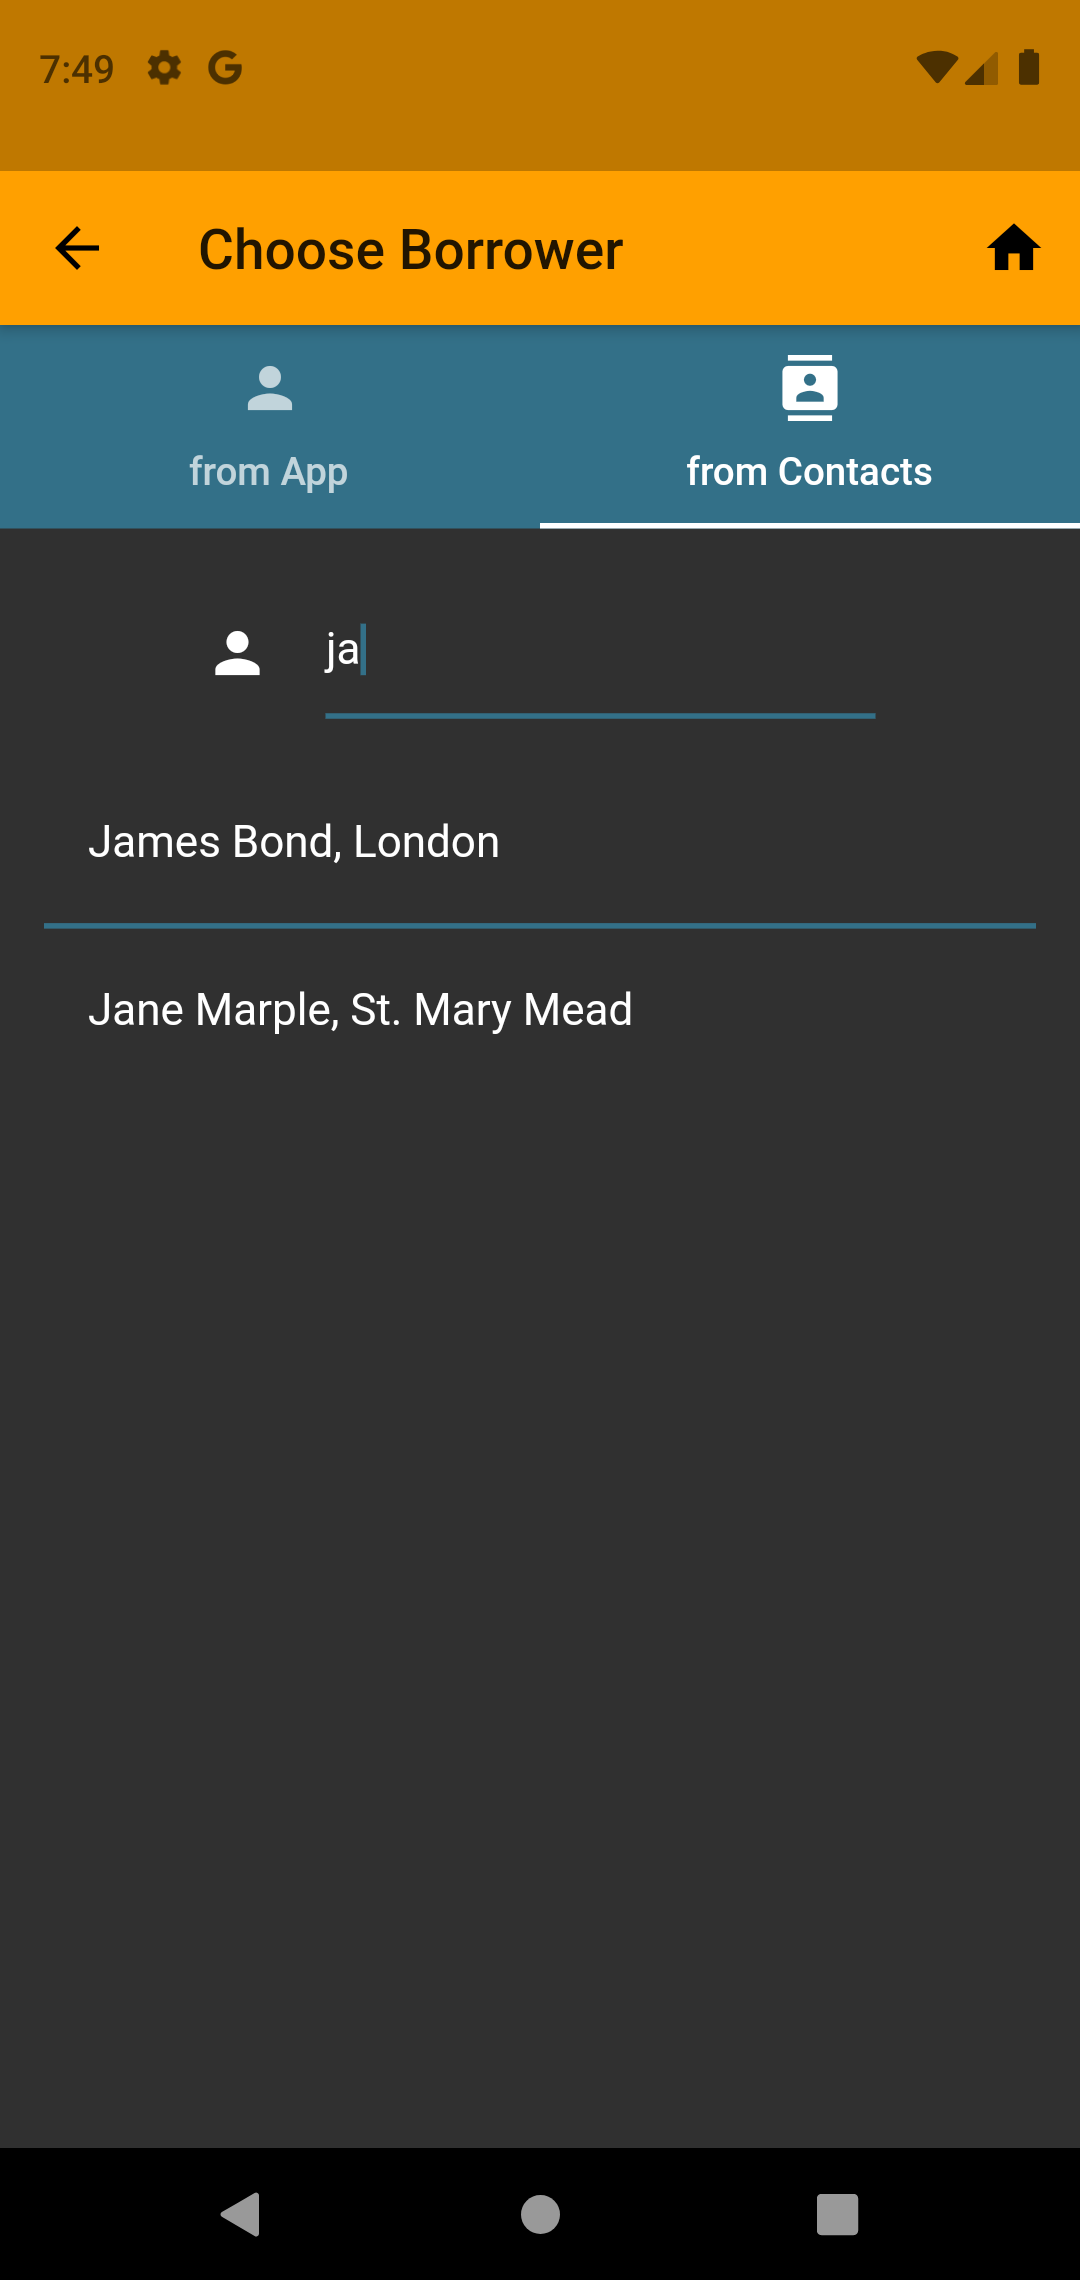
In order to be able to take over people from contacts, you must first enable the option in the settings and then give the permission (read contact data).
The search in the contact data starts as soon as you enter a character in the filter text field.
After you select a person from the result list, a person tab will be created and switch to the borrowing window.
The name, first name, city, phone and email address will be applied (for people with multiple phone/email entries, the preference defined in the settings will be applied.
The button in the top left tab will switch to the list of internally managed borrowers.
The first letters of the first name are typed into the text field in the middle.
Back to the calling page.
Back to the home page.
Give Away - Create 'Borrower card'
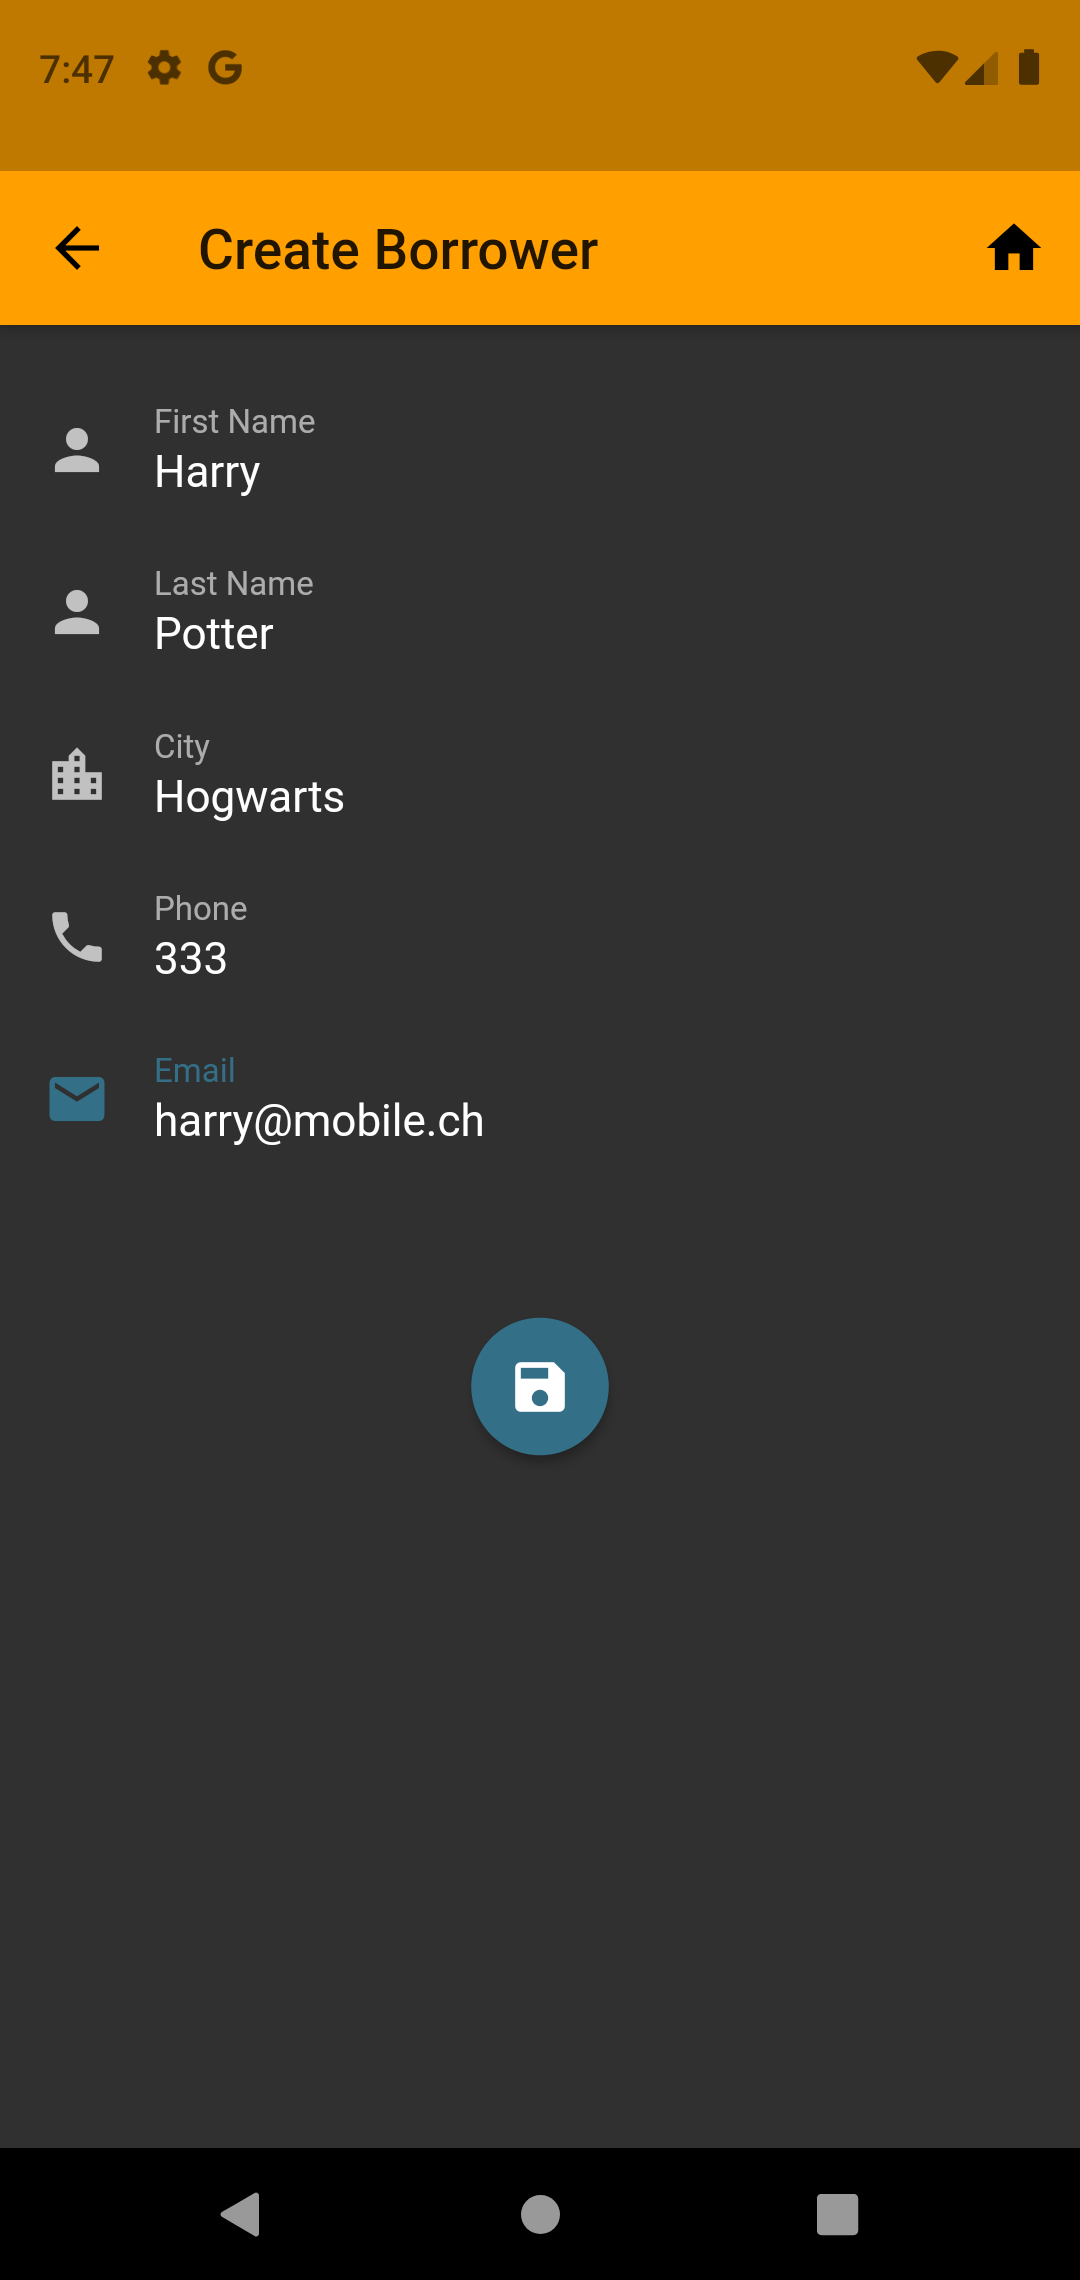
You can also create a ‘Borrower card’ directly. You only need first name, last name and city for identification, and email and/or phone number for callback.
Create a new 'Borrower card'
Back to the calling page.
Back to the home page.
Give away - Create a 'Lending card'
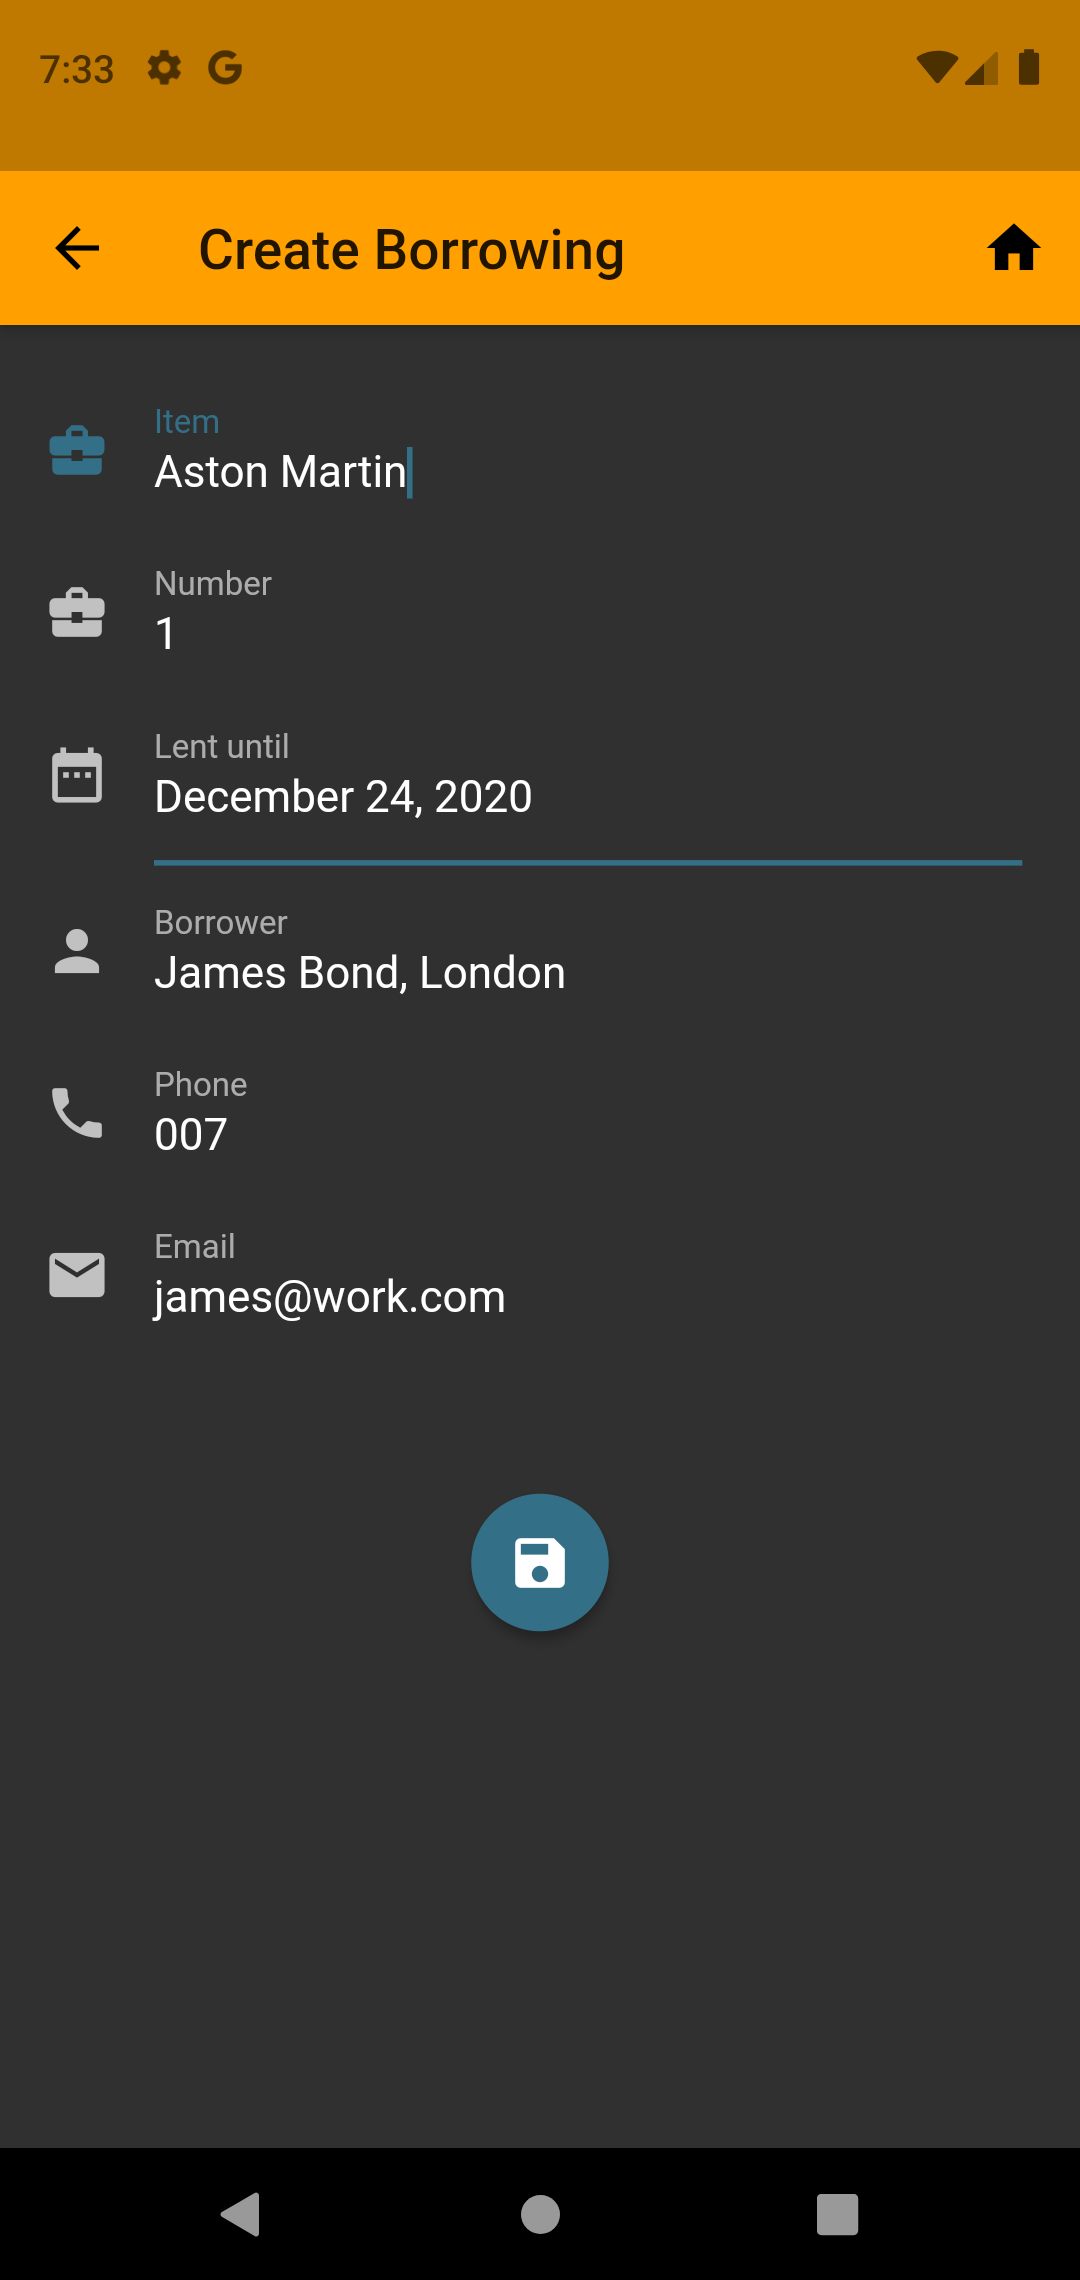
Once you have selected (or created) a borrower, this page will open.
Ideally, all you have to do now is type in the item you want to borrow. The number is preset to 1 and the date to 30 days. Of course you can overwrite these values.
Tap to save the map. After that, the page will exit and return to the person selection page.
Return to the calling page without saving.
Back to the home page without saving.
Call back - List of lent out items
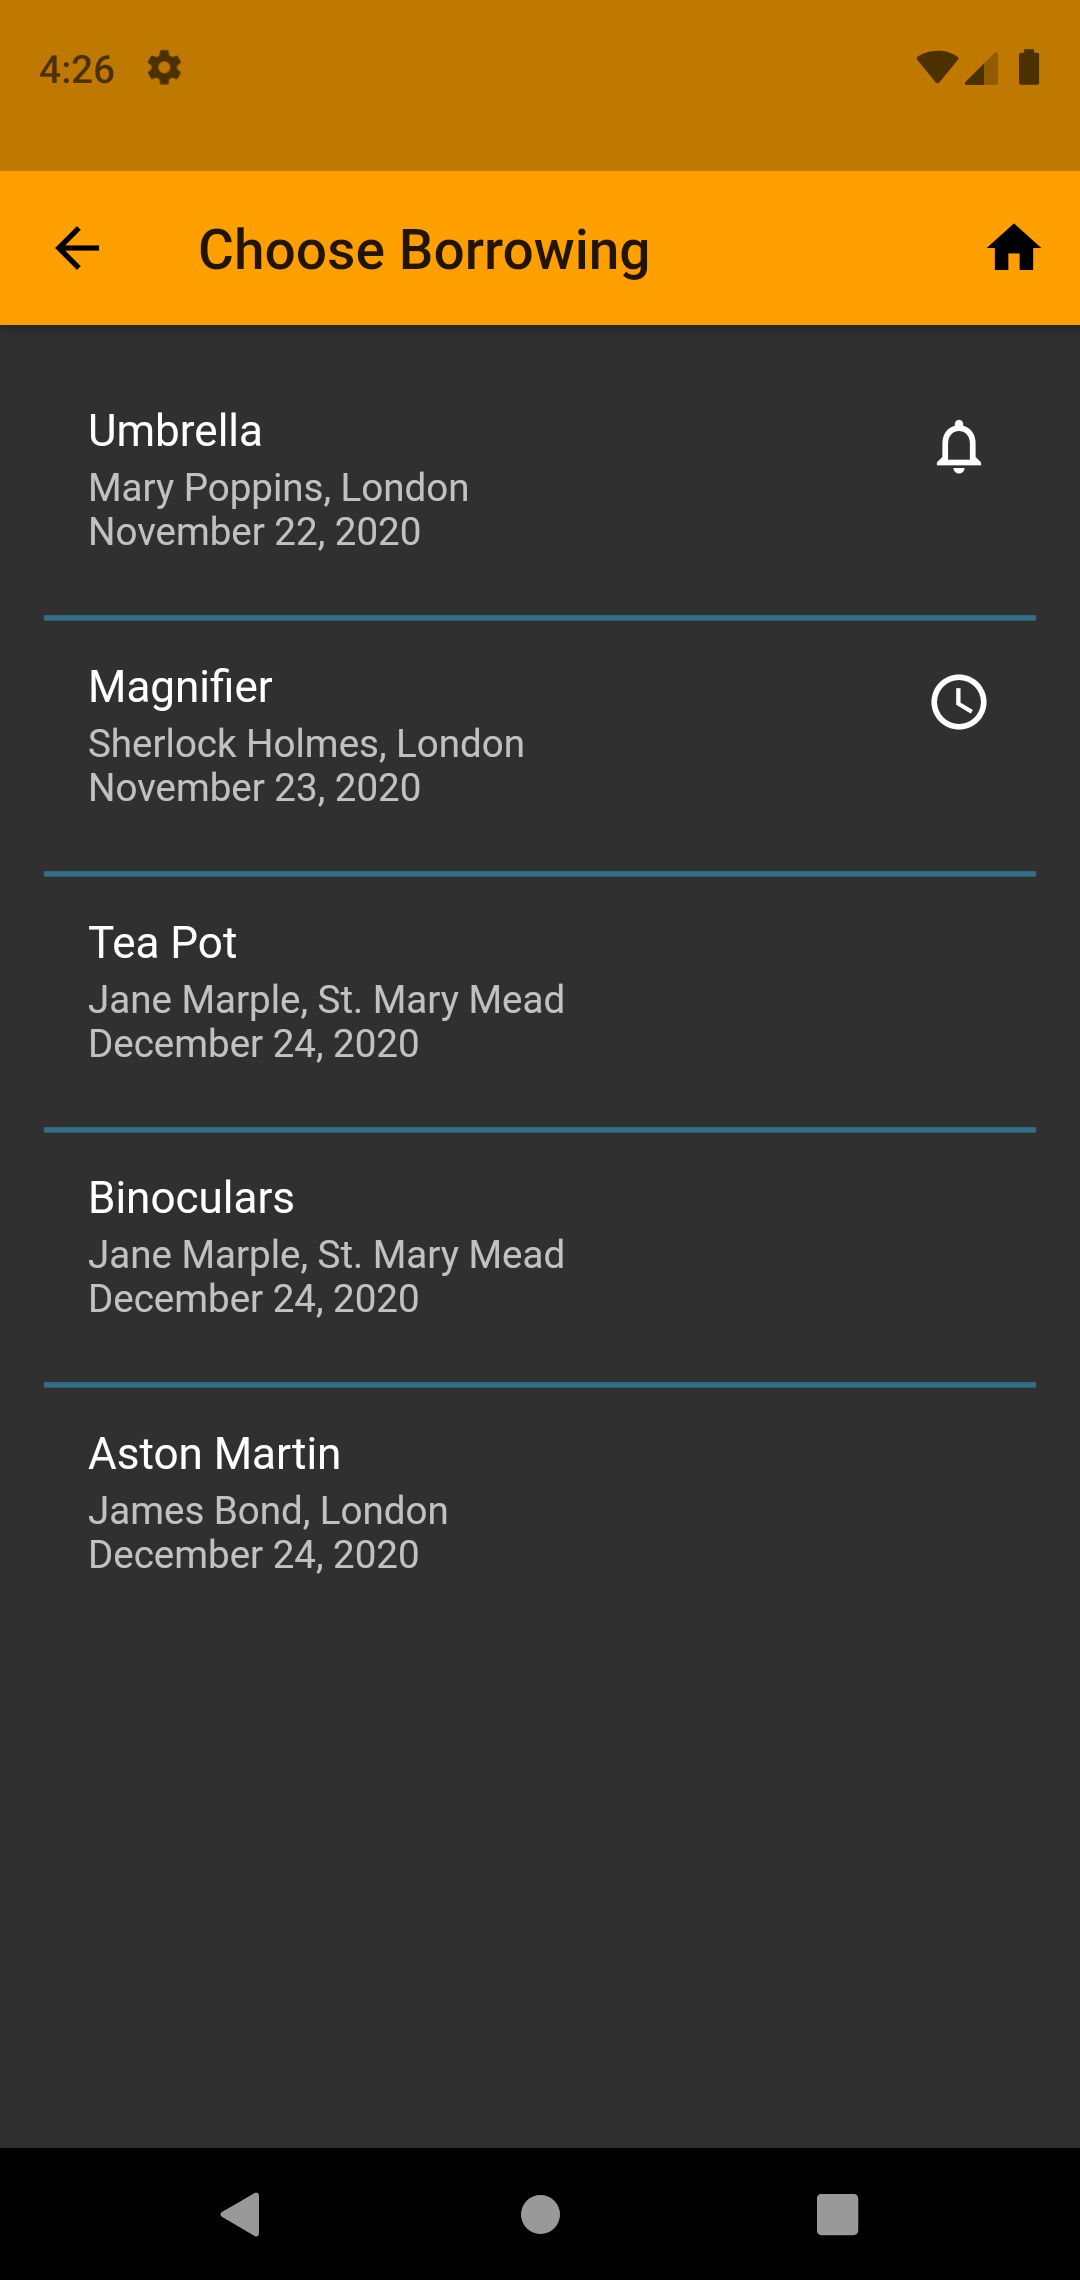
This page will show you a list of all lent out items.
"Tap" on the listitem opens the "callback page"
This marker shows items for which the lent out period has expired.
This mark shows items which have been recalled.
Back to the calling page.
Back to the home page.
Callback - Selection of the callback method
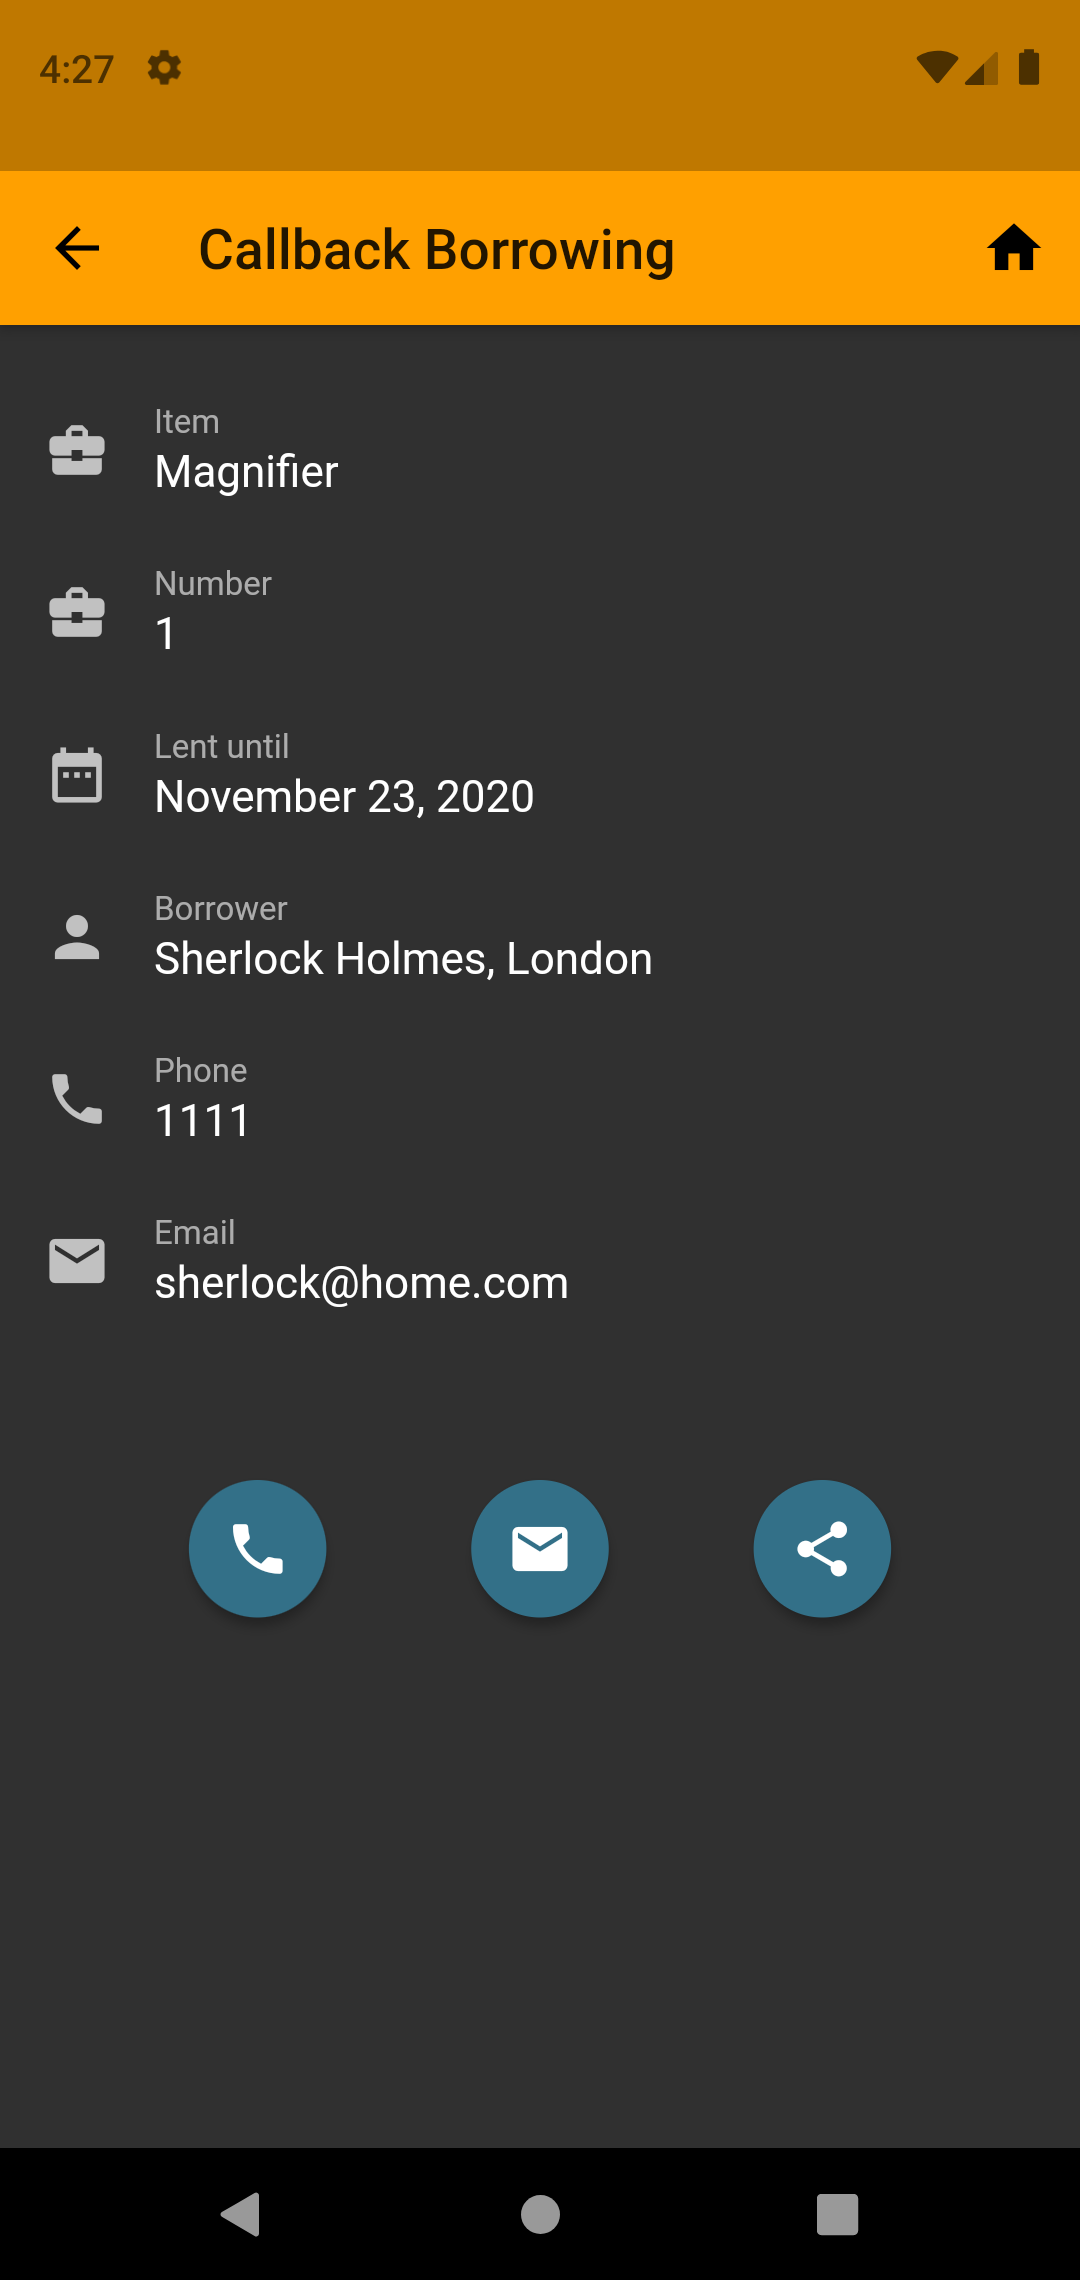
On this page you can choose the method you want use to recall an item. After returning from the selected app, you confirm that the callback was sent, then the corresponding icon will be set.
Opening the phone app, the phone number from the 'Borrower card' is entered.
Open the email app, the email address from the 'Borrower card' is entered, also the "subject" and the "mail text".
Open the share app, from which Whatsapp can be used, for example.
Back to the calling page.
Back to the home page.
Getting back - Selecting the borrower
This page shows those people who have currently borrowed items from you. Choose the person who will give you something back.
Tapping the desired person opens the list of borrowed items.
Back to the calling page.
Back to the home page.
Get back - Select item
Now you can see all your lent out items to this person. Go into the details from here or just swipe the entry away to the left to delete it.
Tapping the item opens a detail window of the lending.
Swiping the item to the left deletes the 'Lending card' (after confirmation).
Back to the calling page.
Back to the home page.
Get Back - Detail Window
This page shows you the details of the loan.
Deleting the 'Lending card' (after confirmation).
Back to the calling page.
Back to the home page.
Manage - Index cards
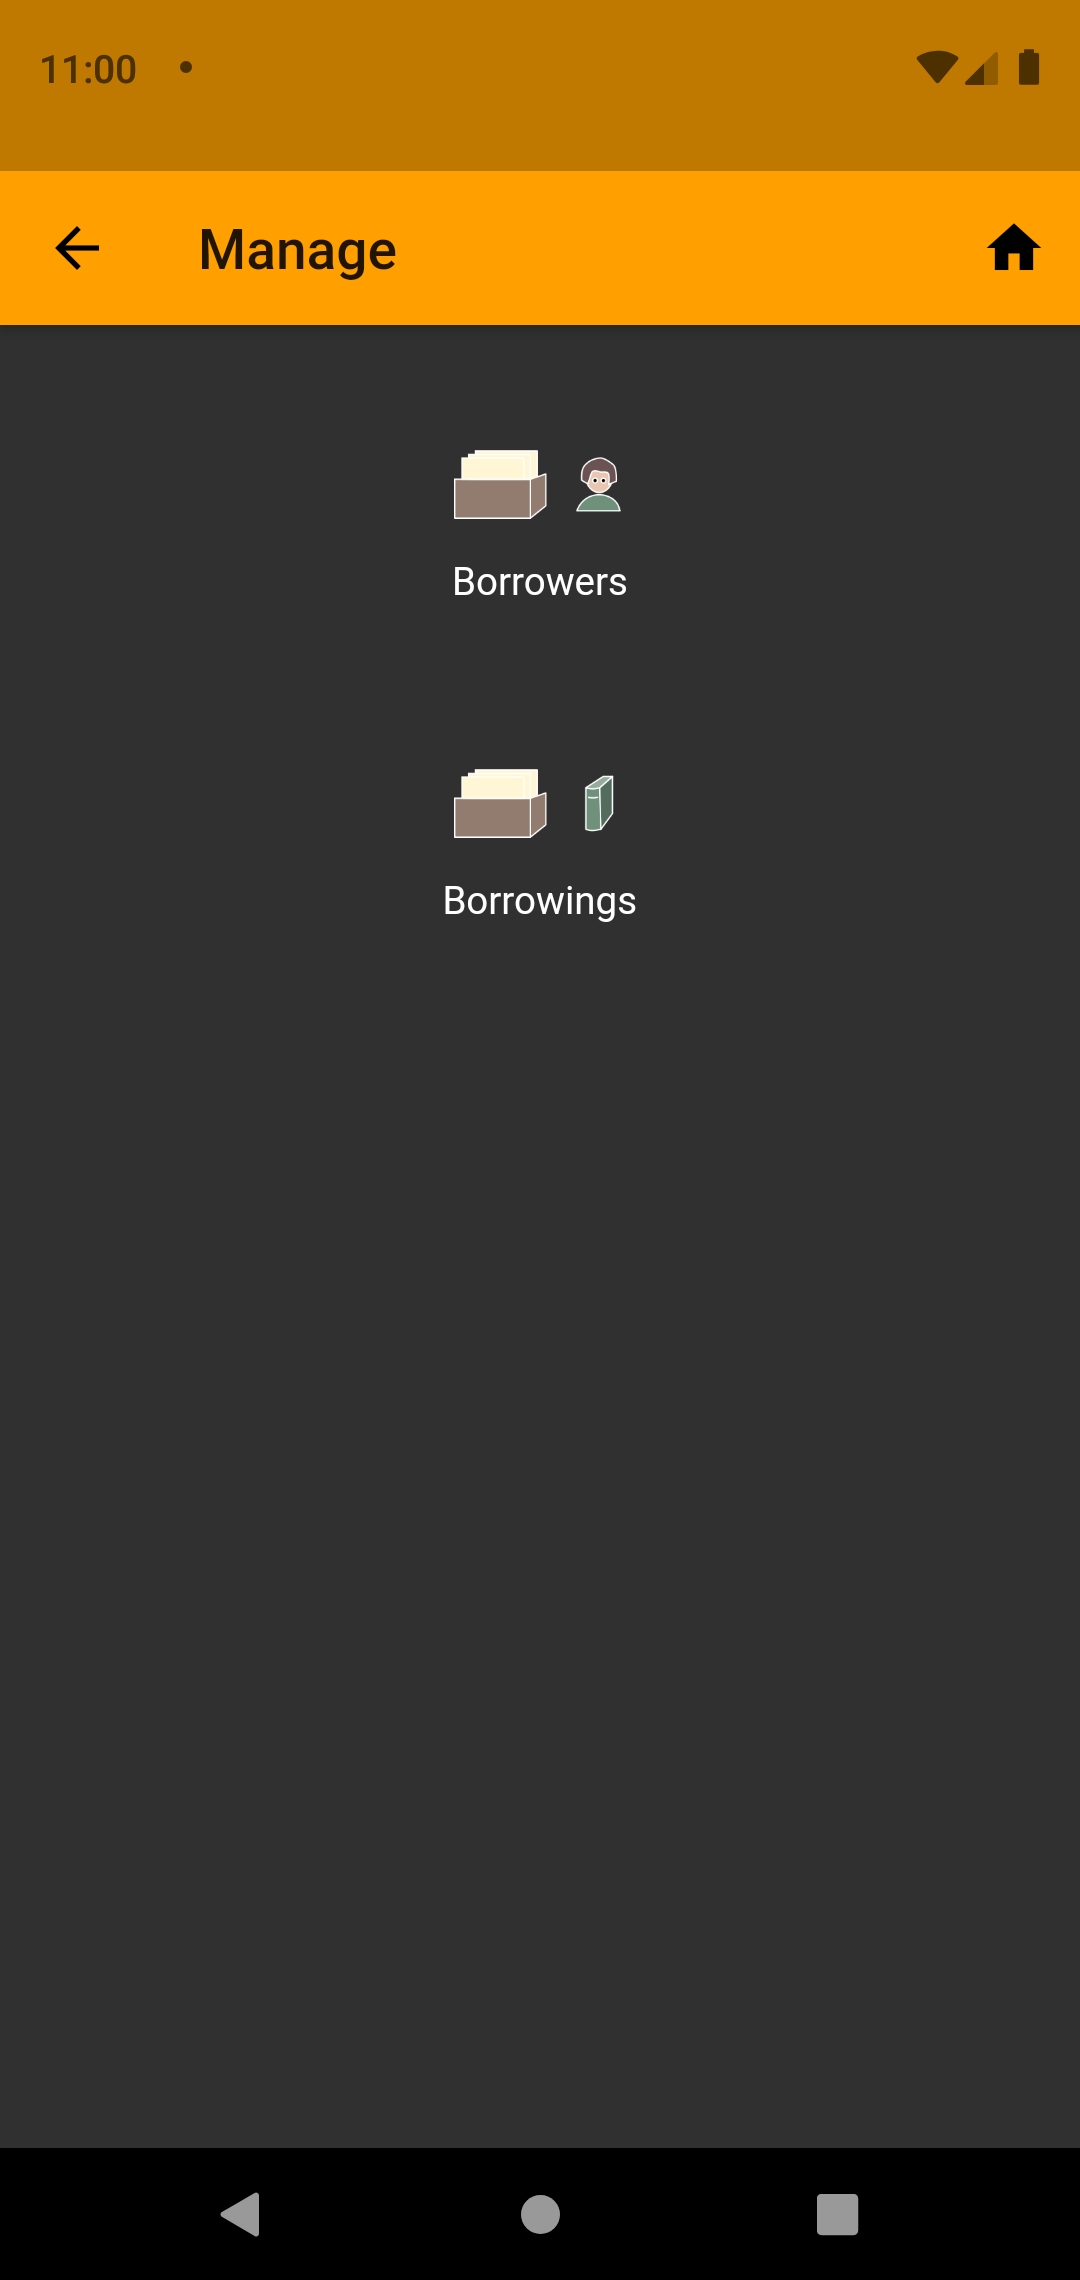
Edit ‘Lending cards’ and ‘Borrower cards’.

Tap to manage 'Borrower cards'.

Tap to manage 'Lending cards'.
Back to the calling page.
Back to the home page.
Manage - Borrowers
Select card for editing or deletion by tapping on it.
Tapping the borrower opens a detail window of the 'Borrower card'.
Swiping the borrower to the left deletes the 'Borrower card' (after confirmation).
Back to the calling page.
Back to the home page.
Manage - Borrower detail
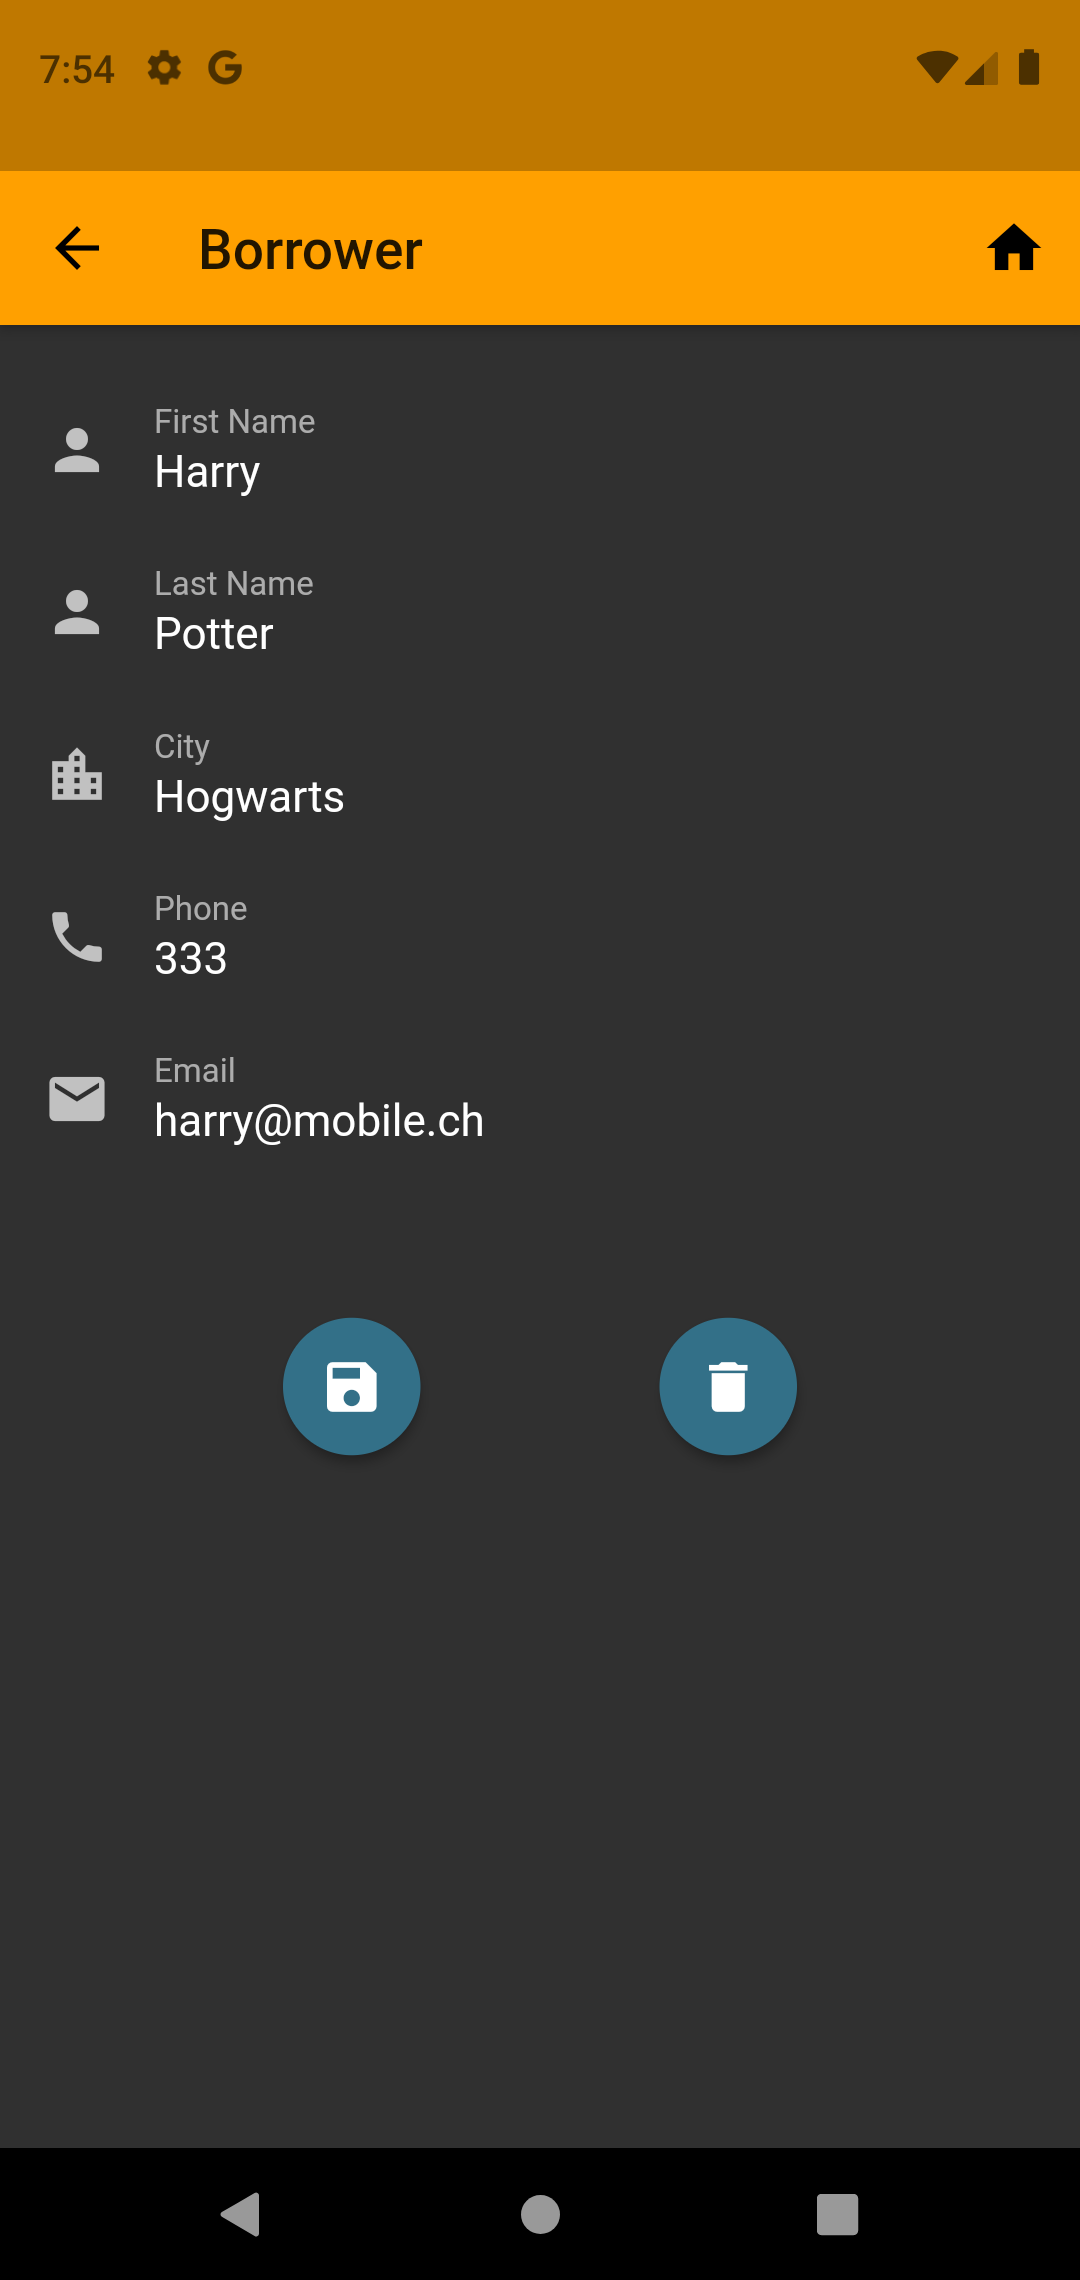
Edit or delete a ‘Borrower card’.
Save the changes
Deleting the 'Borrower card' (after confirmation)
Back to the calling page.
Back to the home page.
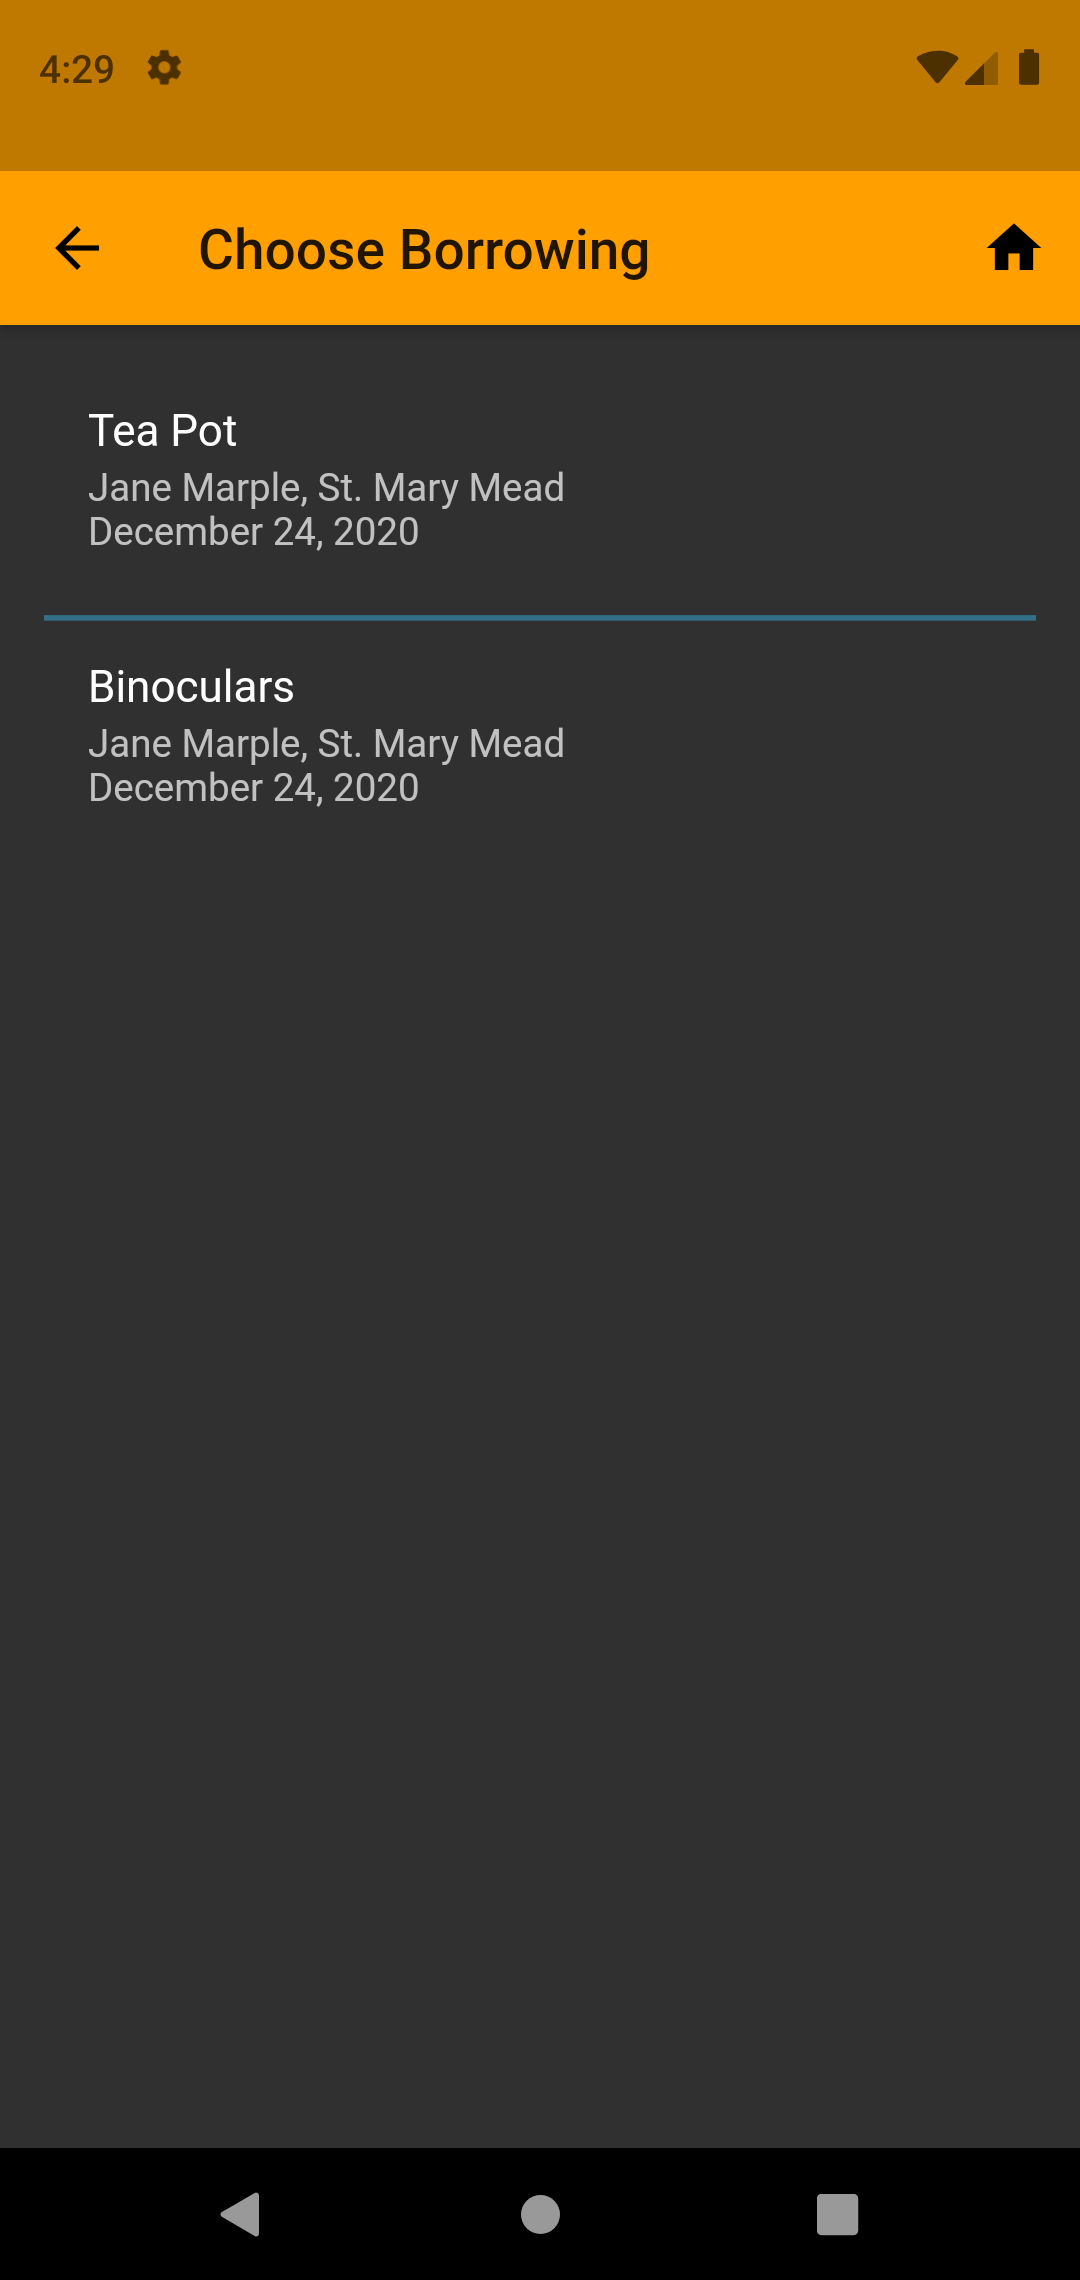
Manage - Lending card

Select ‘Lending card’ for editing or deletion.
Tapping the item opens a detail window of the lending.
Swiping the item to the left deletes the 'Lending card' (after confirmation).
Back to the calling page.
Back to the home page.
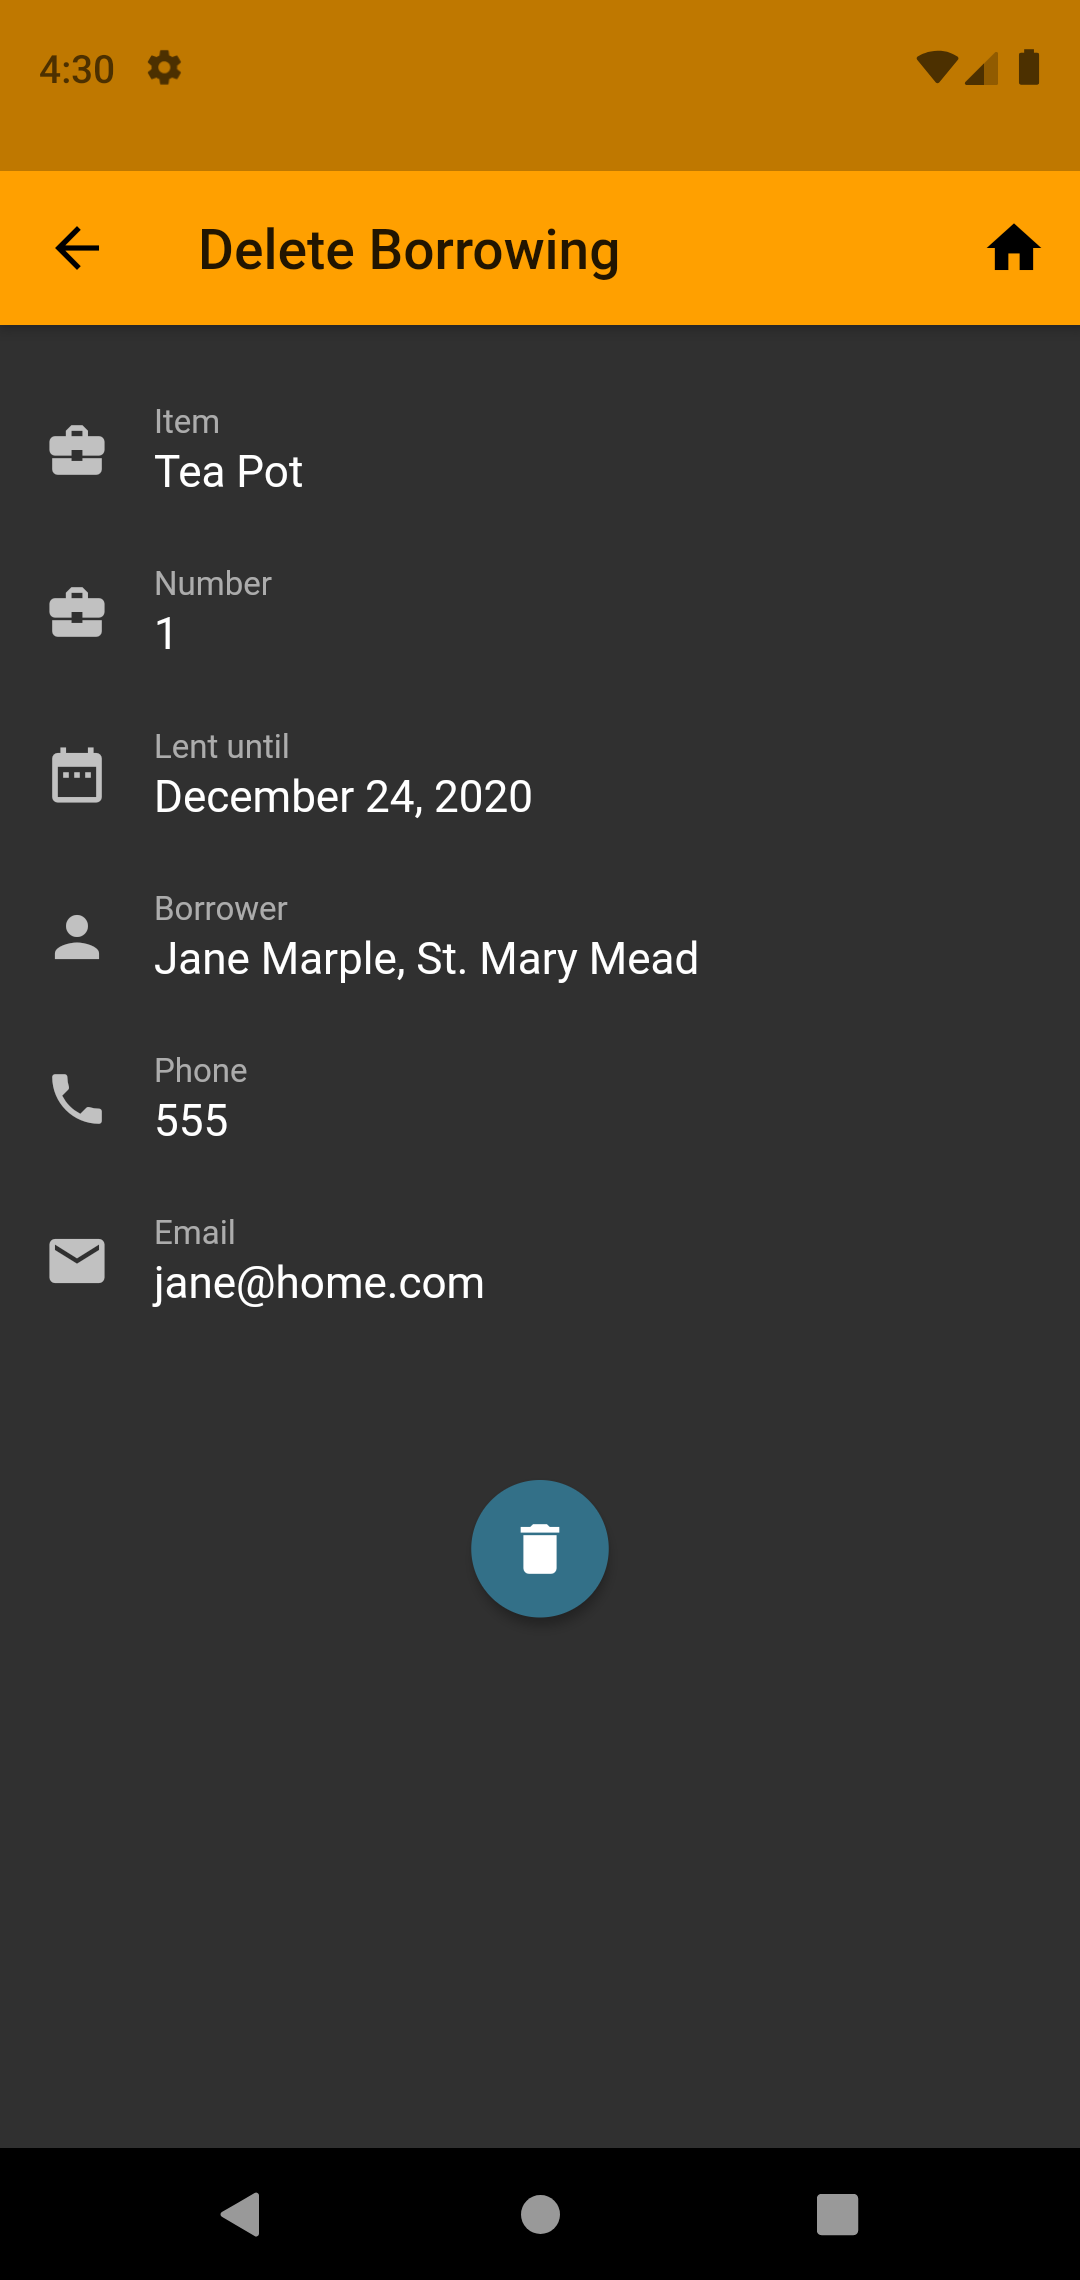
Manage - Lending Detail
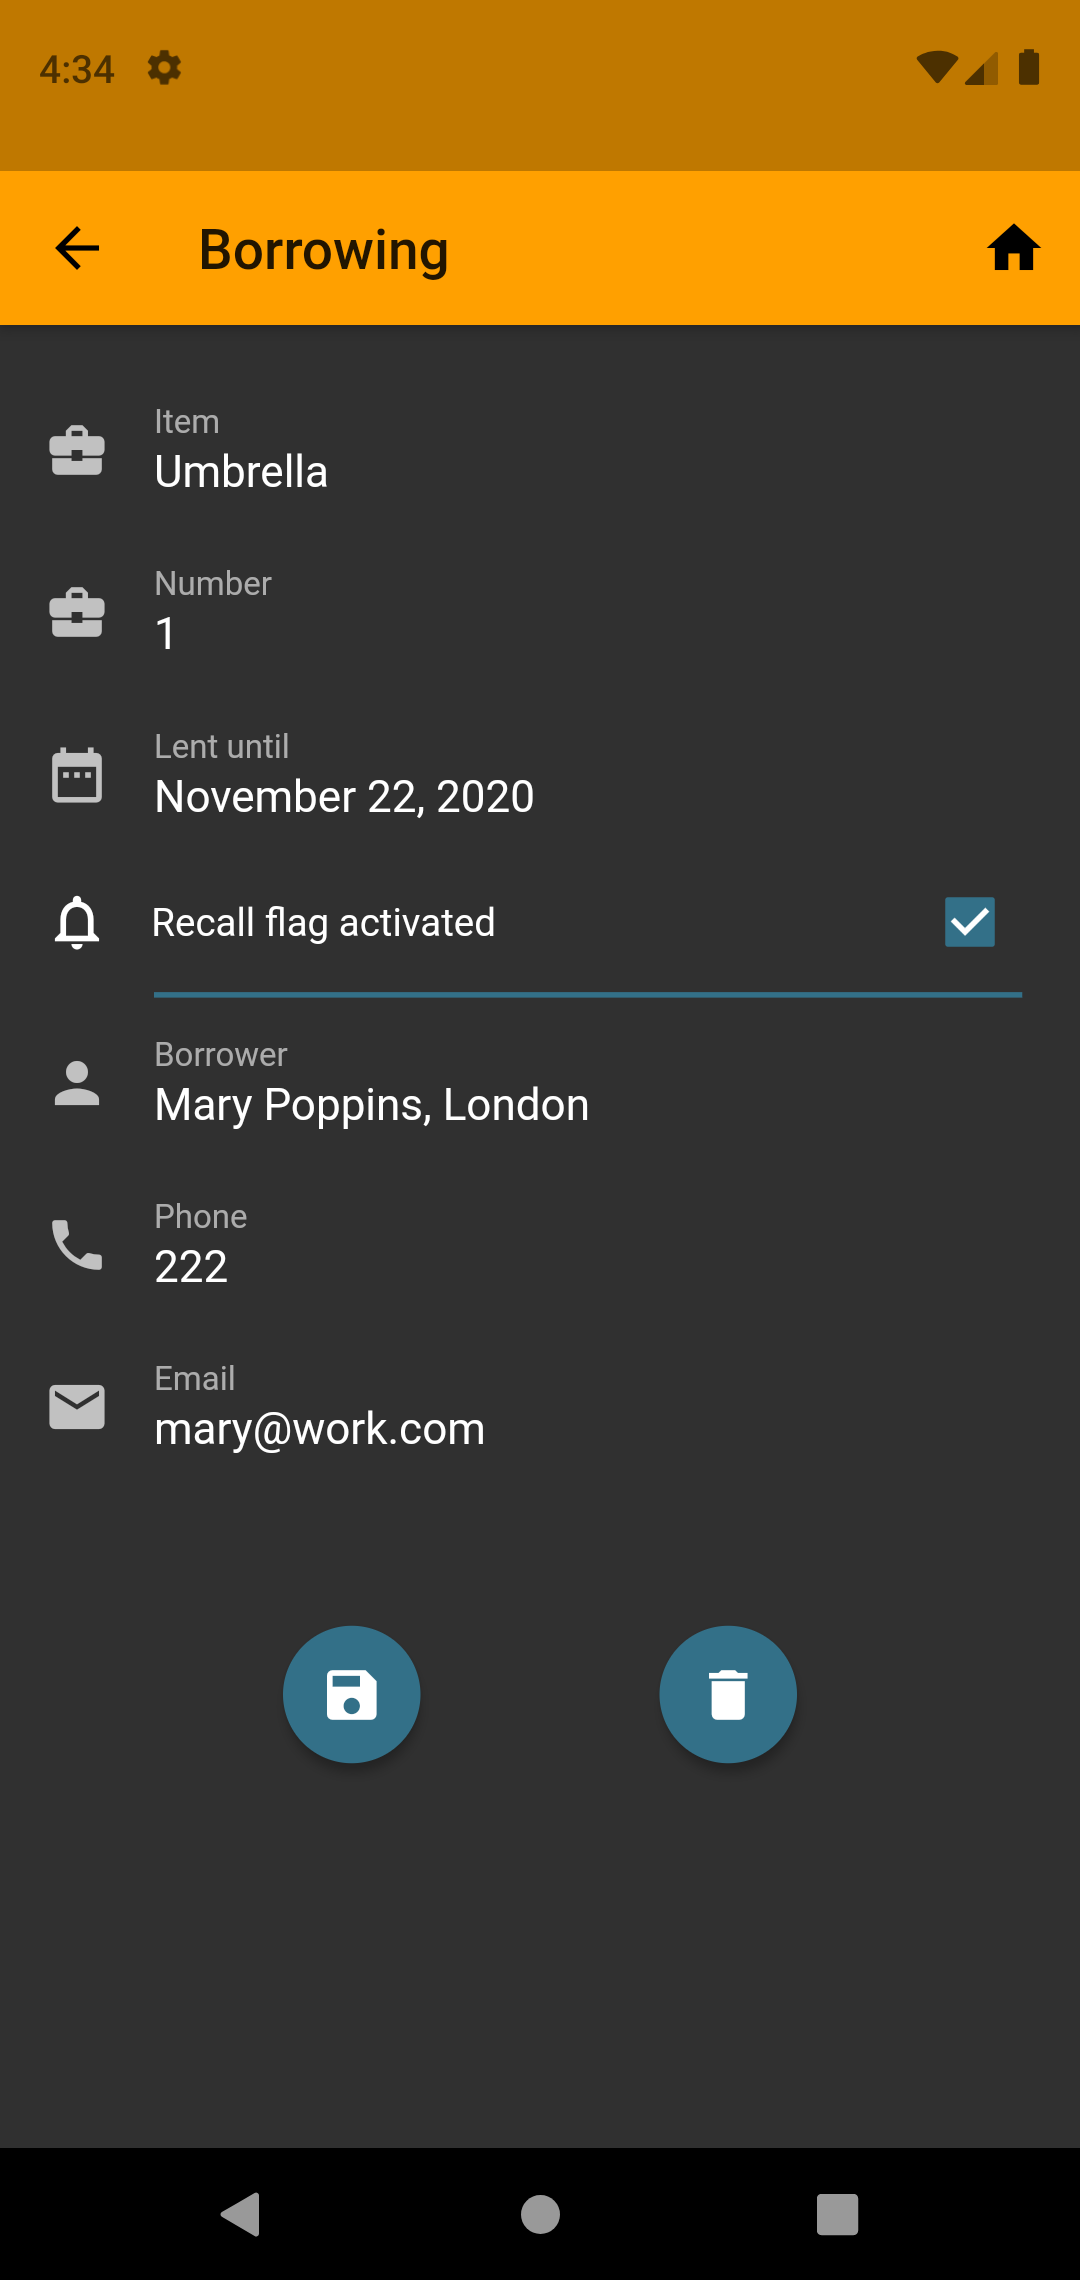
Edit or delete the ‘Lending card’.
Save the changes
Deleting the 'Lending card' (after confirmation)
Back to the calling page.
Back to the home page.
Side Menu
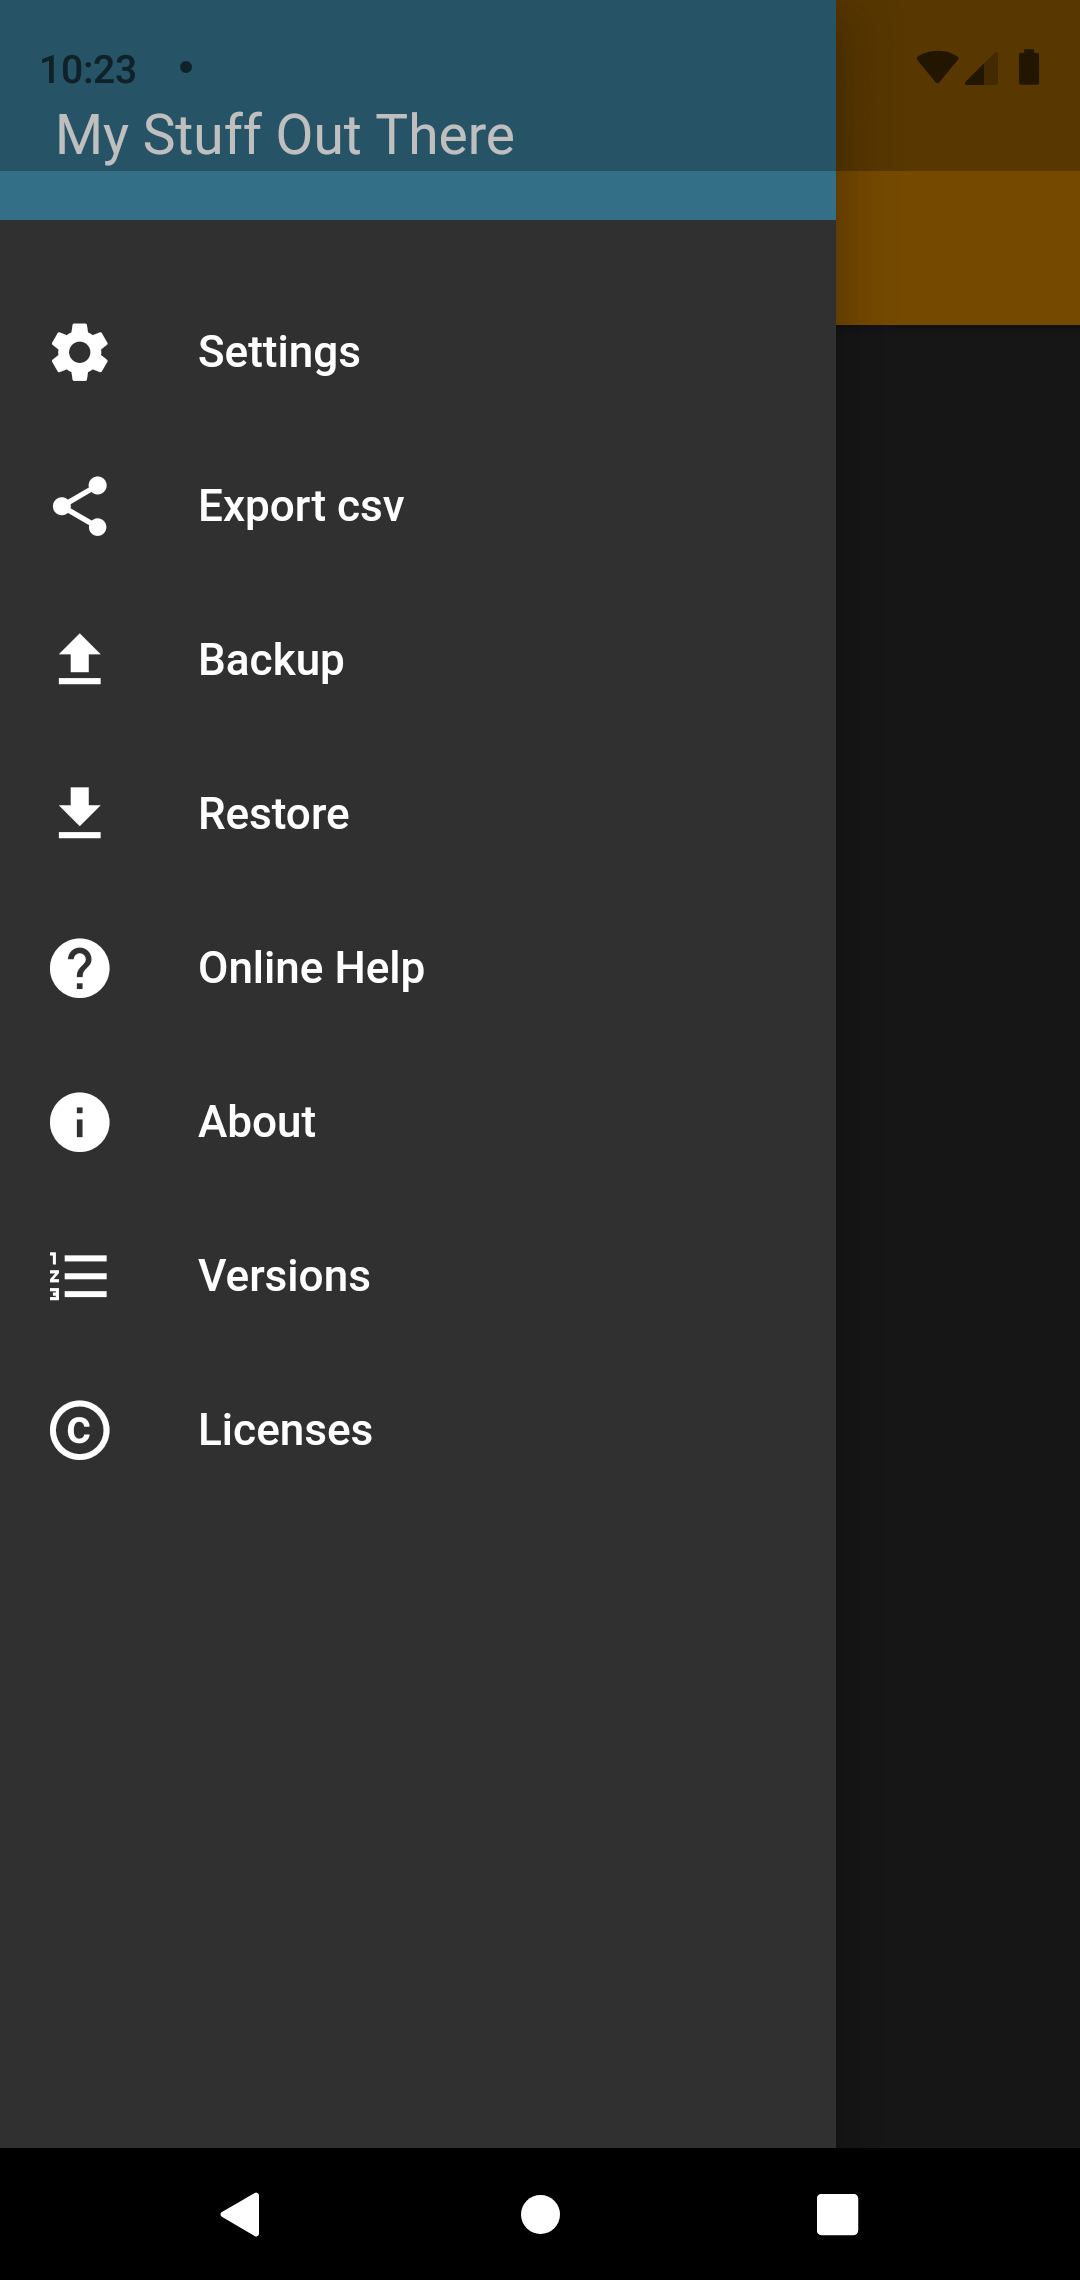
The side menu contains all pages that are not directly related to the lending process.
Swipe the menu to the left to close.
Settings
Exporting index cards in CSV format
Backup of index cards in JSON format
Restore index cards from backup file
Calling this user guide in a browser
App title, author and version number
Change History
License listing
Side menu - Settings
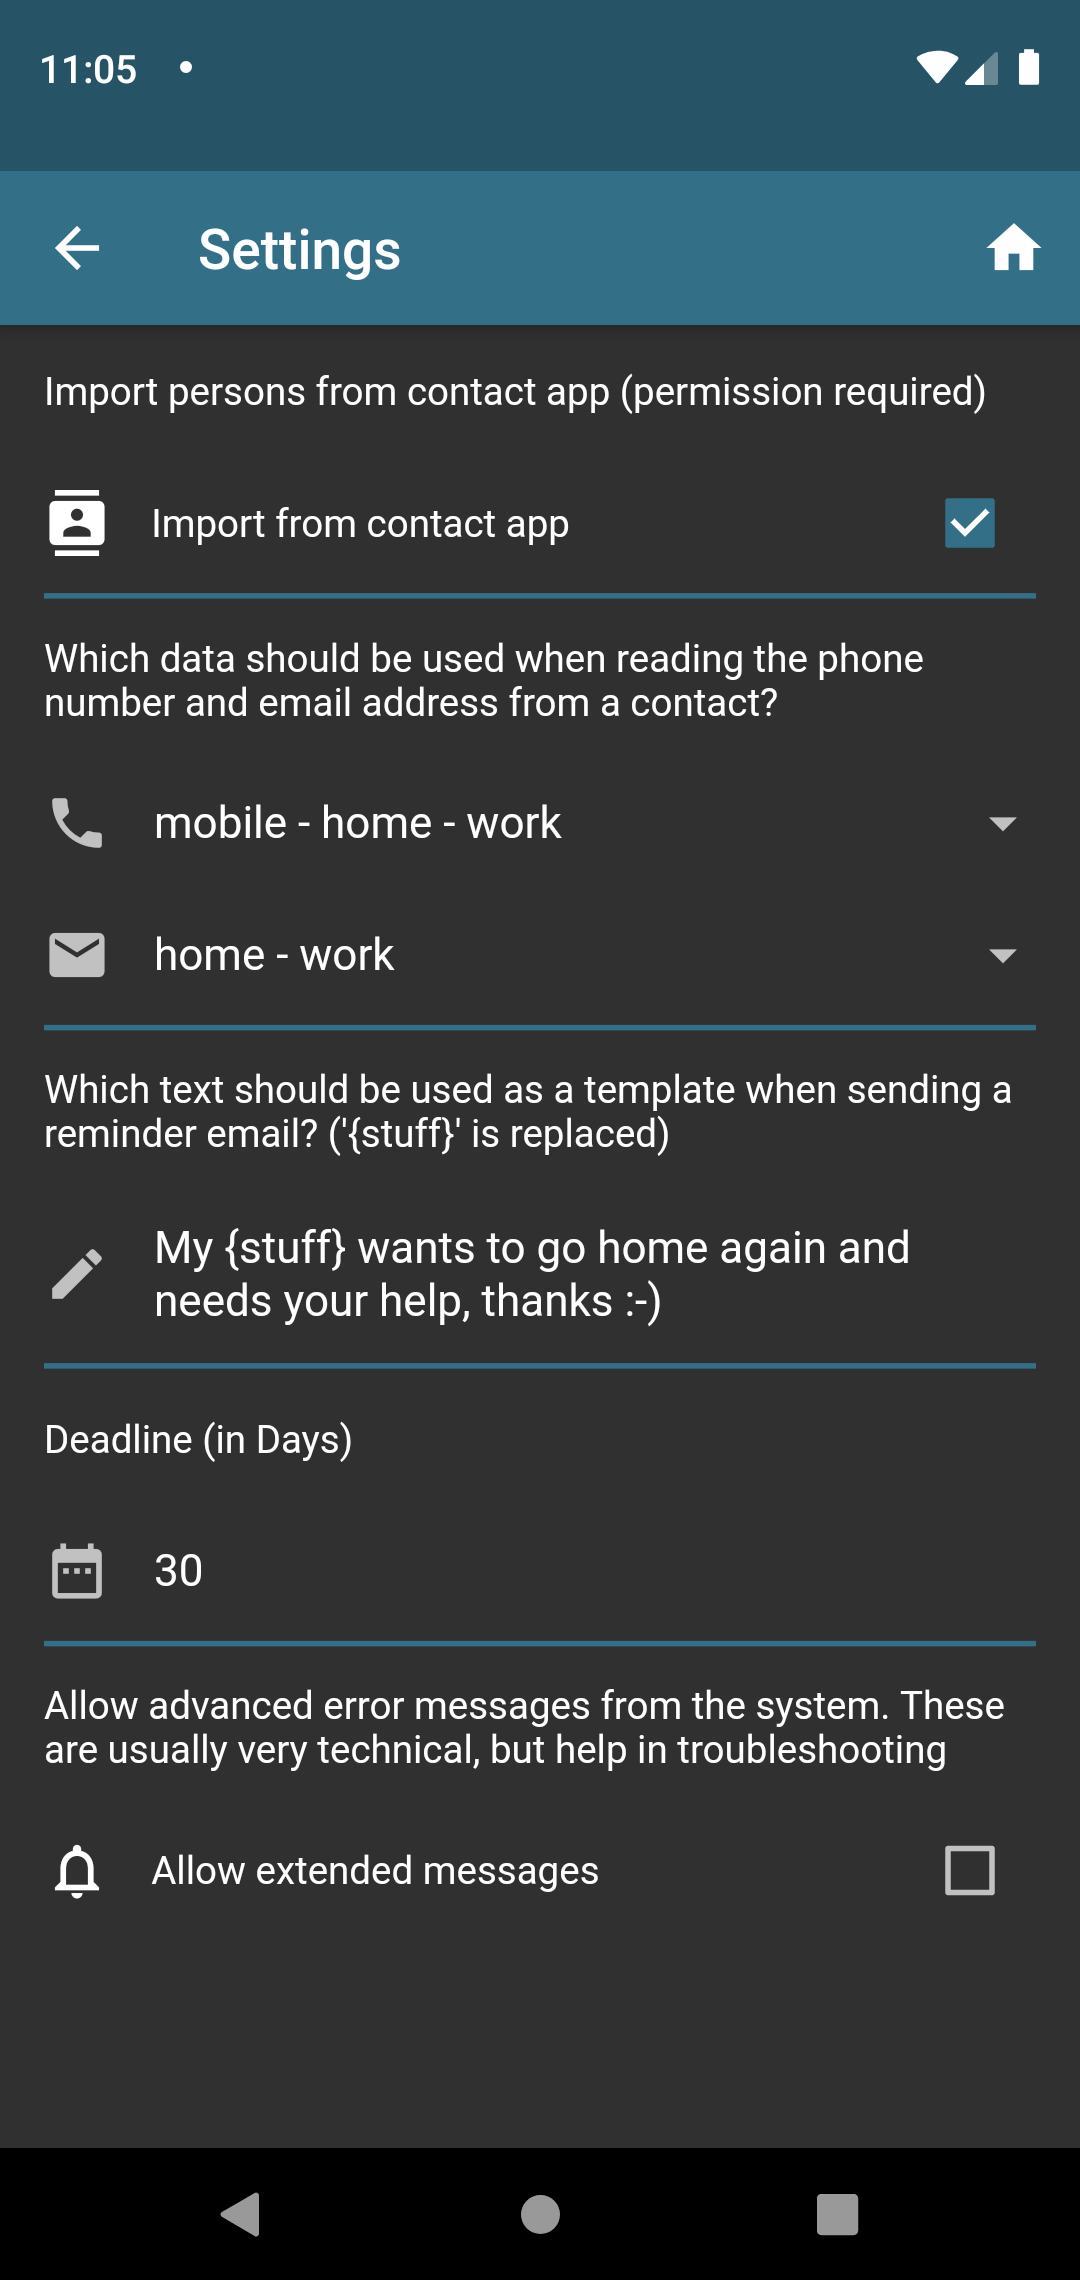
Here you can find various settings that makes working with the app easier.
Back to the calling page.
Back to home page.
Side menu - Export, backup, restore
Export
Exports the data in the database in CSV (comma separated values) format. CSV files can be opened in text editors and spreadsheets. Export files cannot be read back into the app.
Backup
Exports the data in the database in compressed JSON format. This file can be used as a backup and restored to the app using Restore if needed, for example when a new phone is set up.
For security reasons, a backup file should be saved to another device on a regular basis.
Restore
Restore replaces(!) the current data in the app DB with the data from the selected backup file (see Backup).